| Quantity | 3+ units | 10+ units | 30+ units | 50+ units | More |
|---|---|---|---|---|---|
| Price /Unit | $17.49 | $17.14 | $16.60 | $15.89 | Contact US |
 Waveshare ESP32-S3 Development Board ESP32-S3R2 GEEK 1.14-inch LCD ST7789 for USB Dongle Support 2.4GHz WiFi BLE5
$17.68
Waveshare ESP32-S3 Development Board ESP32-S3R2 GEEK 1.14-inch LCD ST7789 for USB Dongle Support 2.4GHz WiFi BLE5
$17.68
 M5Stack M5GO IoT Starter Kit V2.7 High Performance IoT Start Development Kit ESP32 2-inch IPS Screen for Arduino
$96.24
M5Stack M5GO IoT Starter Kit V2.7 High Performance IoT Start Development Kit ESP32 2-inch IPS Screen for Arduino
$96.24
 M5Stack Glass2 Unit 1.51-inch Transparent OLED Extended Screen Unit for SSD1309 Driver Solution
$34.22
M5Stack Glass2 Unit 1.51-inch Transparent OLED Extended Screen Unit for SSD1309 Driver Solution
$34.22
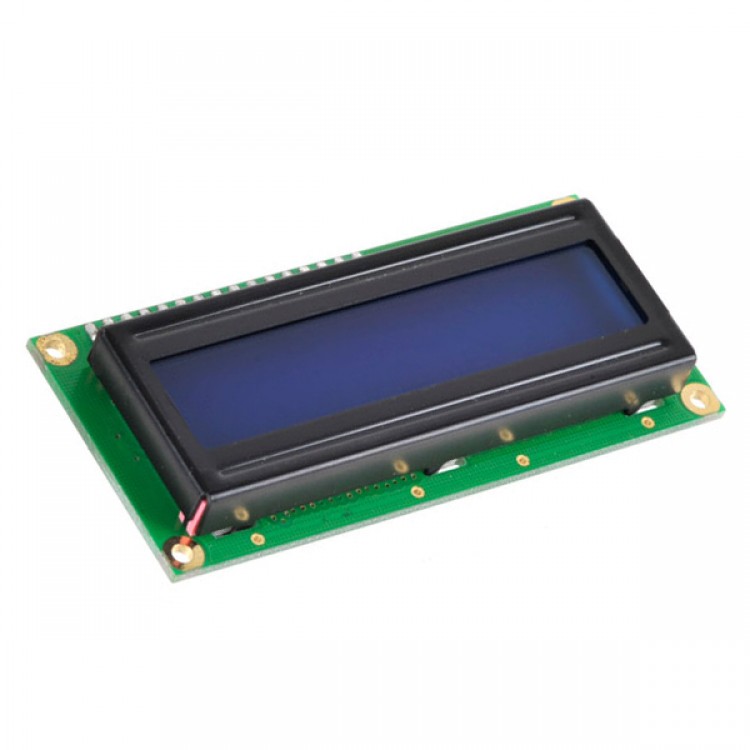
Arduino Serial LCD-1602 Shield Module
LCD screen is a character 1602 which is often used in the production of electronics and of course it's a simulation.It can be used to display two rows of characters, and each row is 16 characters:
However, to control such a common module is not so easy. First of all, we must occupy the corresponding Arduino pin according to its 4 lines work mode or 8 lines work mode, but this actually occupied more digital I/O pin, especially 8 lines connection mode. Second,although there are corresponding libraries to support,but you should pass the debug,and run on Arduino successfully, at the same time it can meet a lot of problems. Finally, the code to control LCD need take up corresponding memory space, which is difficult for 16K memory space of Arduino.
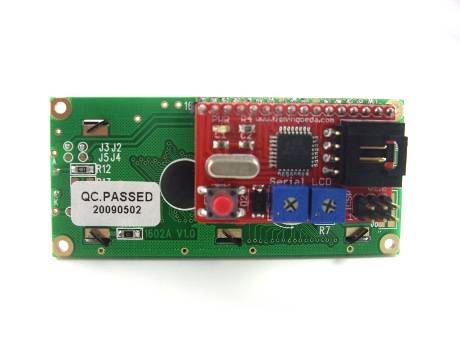
In order to solve these problems, we have designed this type of serial LCD module based on 1602 characters.To compared with the method before,the advantage is obvious:
1、Adopt serial port to control, to cut down the number of cables linking to the hardware;
2、Do not occupy the memory space of Arduino;
3、To minimize the debugging time through successfully verifying the code.
It can be easily connected with Arduino through sensor extended shield and special sensor cable.
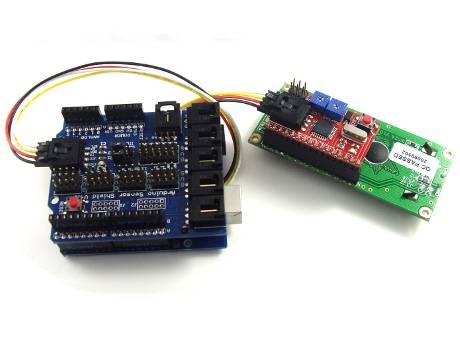
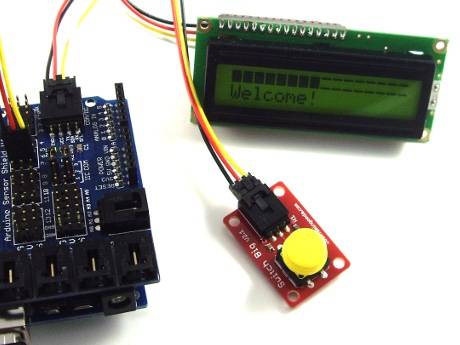
In order to demonstrate its function, you can connected a button module on sensor extended shield , when push the button, Arduino will send corresponding controlling order through serial LCD. When this module is powered ,the effect shown as below:
The Arduino running Code is :
int switchPin = 7; // set the digital interface 7 as the interface of big button interface
int value = 0;
void setup()
{
Serial.begin(9600); // set the baud rate as 9600
pinMode(switchPin, INPUT); // set the digital interface 7 as input mode
}
void loop() {
if (HIGH == digitalRead(switchPin)) // if the switchPin is high , then go on following command
{
Serial.print("$CLEAR\r\n"); //clear screen
Serial.print("$GO 1 1\r\n"); // display address is : the line 1,the row 1
Serial.print("$PRINT Emartee COM\r\n"); // display the character "Emartee COM"
Serial.print("$GO 2 4\r\n"); // display address is : the line 2,the row 4
Serial.print("$PRINT Hello World!\r\n"); // display the character "Hello World!"
Serial.print("$CURSOR 1 1\r\n"); // CURSOR move to line 1 , row 1
}
}
You can see that all serial port order to control LCD begin with ”$”and end by ”\r\n” when compared with this code,Both of them is corresponding order and parameters,different commands with different parameters.
"r" means (the current cursor movement to first line , do not move to the next line)
"n" means (the current cursor movement to the next line , do not move to the first line)
Command Definition :
1、"GO" is cursor movement.
2、"PRINT" is to display the serial characters on the cursor position.
3、"CLEAR" is to clear screen .
4、"HOME" is to move the cursor to the initial position of the top left corner of the screen.
5、"CURSOR" is to set the effect of cursor, the first parameter is whether display cursor (1 and 0), the second
parameter is whether blink cursor (1 and 0).
Command List :
1) Serial.print("$CLEAR\r\n") means "clear screen"
2) Serial.print("$GO Line(1 or 2) Row(1 to 16)\r\n")
3) Serial.print("$PRINT Display the characters \r\n")
4) Serial.print("$GO Line(1 or 2) Row(1 to 16)\r\n")
5) Serial.print("$PRINT Display the characters\r\n")
6) Serial.print("$CURSOR 1 1\r\n")
Example :
Serial.print("$CLEAR\r\n")
Serial.print("$GO 1 1\r\n")
Serial.print("$PRINT Emartee\r\n")
Serial.print("$GO 2 4\r\n")
Serial.print("$PRINT Hello World!\r\n")
Serial.print("$CURSOR 1 1\r\n")
When Arduino detect that the button was pushed down, it will send the corresponding commanding order of connectting to the serial LCD and the effect is shown as below: