| Quantity | 3+ units | 10+ units | 30+ units | 50+ units | More |
|---|---|---|---|---|---|
| Price /Unit | $78.40 | $76.80 | $74.40 | $71.20 | Contact US |
 AXera PI Zero Module 5MP AI-ISP Camera Module Designed with SoC Chip AX620Q+SC450AI Image Sensor
$67.98
AXera PI Zero Module 5MP AI-ISP Camera Module Designed with SoC Chip AX620Q+SC450AI Image Sensor
$67.98
 0.5-inch 1024X768 OLED Driver Board High Quality Circuit Board for V760A-5 Wearable Head Mounted Display
$40.24
0.5-inch 1024X768 OLED Driver Board High Quality Circuit Board for V760A-5 Wearable Head Mounted Display
$40.24
 1PCS SFP+ Dual Mode Optical Module Small Form-factor Pluggable Transceiver Support 10Gbps Transmission with LC Interface
$26.09
1PCS SFP+ Dual Mode Optical Module Small Form-factor Pluggable Transceiver Support 10Gbps Transmission with LC Interface
$26.09
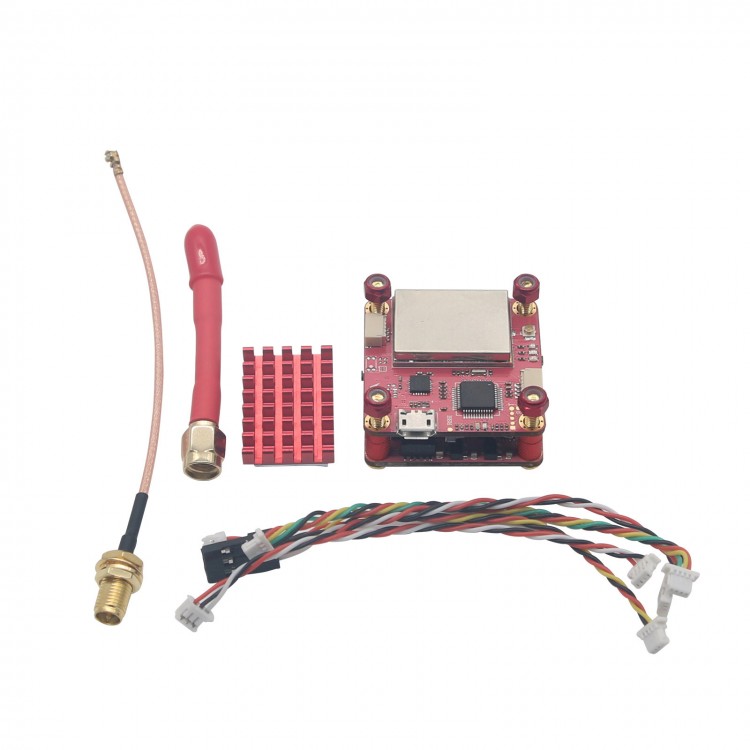
Flytower PRO F3 Flight Controller Board OSD BEC 4 in 1 BLHeli_S Dshot 600 ESC VTX with Audio
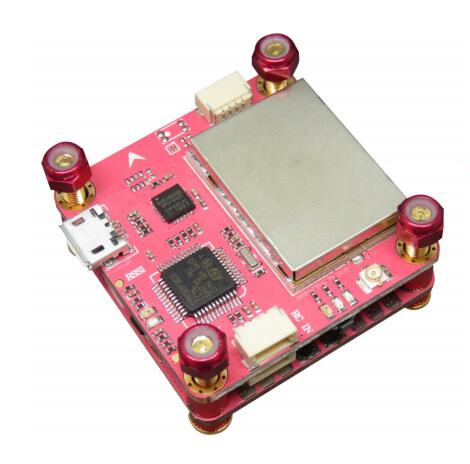


Product Description:
- The Flytower PRO F3 board was designed basing on OMNIBUS/OMNIBUSF4SD (Betaflight) FC and highly integrated with OSD,BEC,4 in 1 BLHeli_S/Dshot 600 ESC and VTX with audio (OFF/25/200/400mW).It gives you all the features what you need in FPV, which makes you easily get into FPV racing.
- Practical - Easy to access connectors
- Configurable - Choose to use connectors
- Stackable - Mount our 4 in 1 ESC
- Compact - Only 36x36x15mm.(Add air-cooling fin MAX 36*36*20MM)
- Weight - 28.7 grams and 2 stack boards
- Professional - Symmetrical, Neat and Tidy and Easy to install in any racing drone
- 36x36mm board with 30.5mm mounting holes
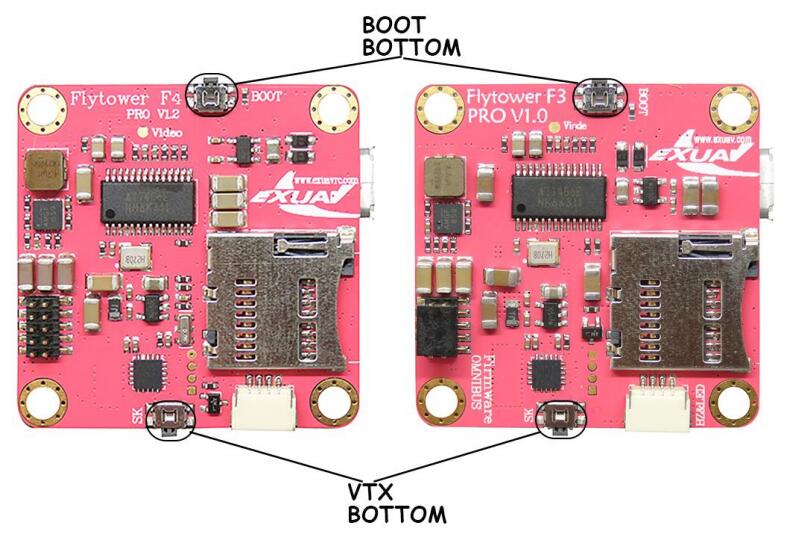
- STM32 F303 MCU(Flytower PRO F3 ), Runs Betaflight firmware(supported from V3.1.7)
- SD card slot
- Use MPU6000 as Acc & gyro over SPI Bus
- STM32 controls OSD chip over SPI in DMA mode, less CPU using, faster rate
- Micro USB socket
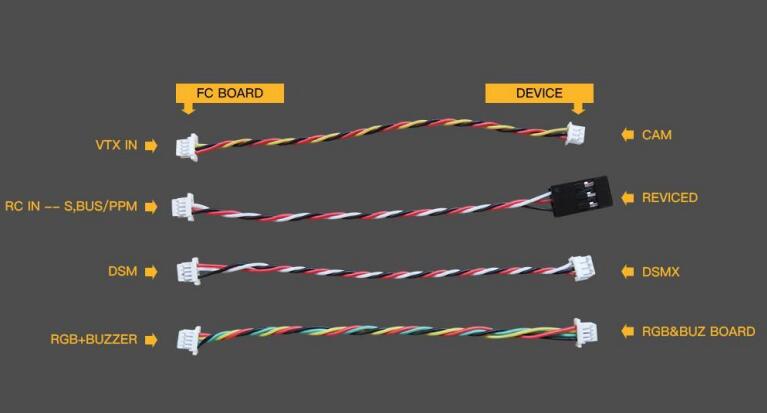
- 1x 4pins JST-SH sockets (PPM, PWM, SERIAL RX, GPIO, ADC, 3V, 5V, GND)
- The on-board pins are easily connected to our next 4 in 1 ESC &PDB board
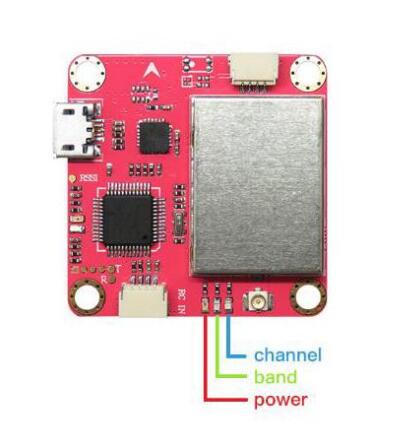
- Internal VTX with audio (48CH) (OFF/25/200 / 400mW adjustable power video transmission)
- 1x 4pins JST-SH sockets with BUZZER & WS2811 RGB LED
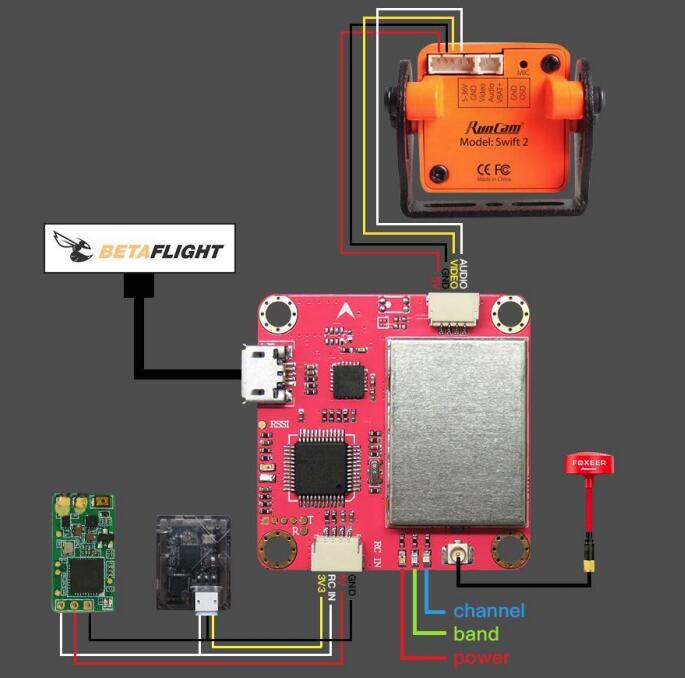
- 1x 4pins JST-SH socket for Video and Audio transmission
- 1 IPX sockets easy connect the external antenna
- 4x 3 Pads for motor output
- 1x2 Pads for batter in easy solder
Product specifications:
- 4 in 1 ESC
PDB:Integrated
Battery Monitoring:Integrated
FC Power:Integrated
Operating Voltage:2-4S Lipo
Maximum continuous operating current:4*40A
Maximum instantaneous operating current:4*45A(5 Seconds)
Oneshot 125/42/ Dshot 150/300/600:YES
BlheliSuite Configurable:YES
Firmware Version:BLHeli_S/Dshot 150/300/600;16.6(A_H_15/L_H_0)
Board Size:36*36mm
Weight:10g
- FC&VTX Board
Firmware Version:Betaflight:3.1.7;OMNIBUS(Flytower PRO F3)
Configure:Betaflight
VTX Power:OFF/25/200/400mW(MAX 800mW)
CH:48CH
OSD Firmware:Betaflight OSD
Video Camera Voltage:Any stand by 5V Video Camera
Board Size:36*36mm
Weight:11.4g
-Flytower F3/F4 PRO
Any Board weight:21.4g
Total weight:28.7g
Installation height(Add air-cooling fin):15mm/20mm
Screws:M3*18mm
Recommended Rack Plate Thickness:Not more than 3mm (3mm above the appropriate extension of the screw)
User manual:Click here
How to solder and Install the Flytower PRO?
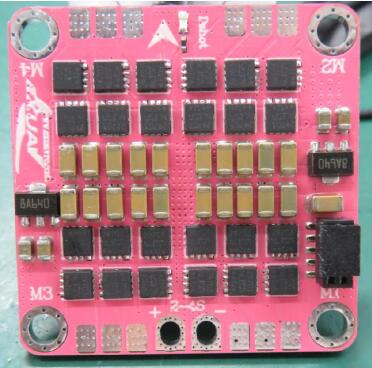
- Weld and Install the Flytower PRO
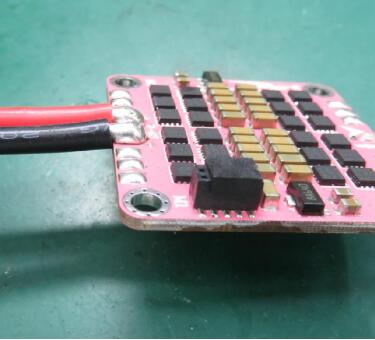
- When you receive the product and open the package, see the ESC board as shown below, you need to follow the instructions of the following tutorial .You have to step by step and you will easily complete your work of welding.
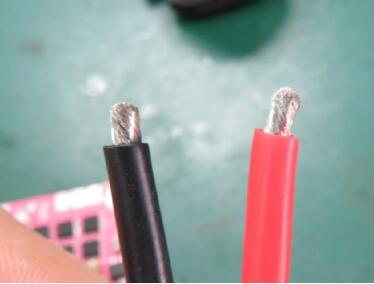
- 1, Please change the length of the power supply cable to fit your need, and we recommend to use the cable of# 14 AWG, and peel off the outer skin of the cable, the length of the metal is about 3-5mm , and twist the peeled metal parts, then you could add solder to the stripping of the power cord which can make it more stable.
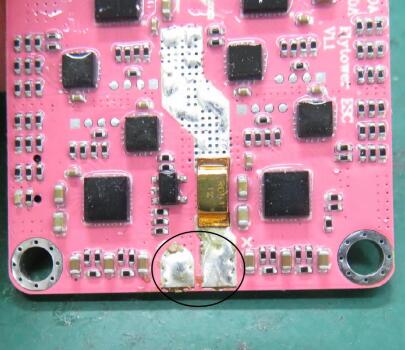
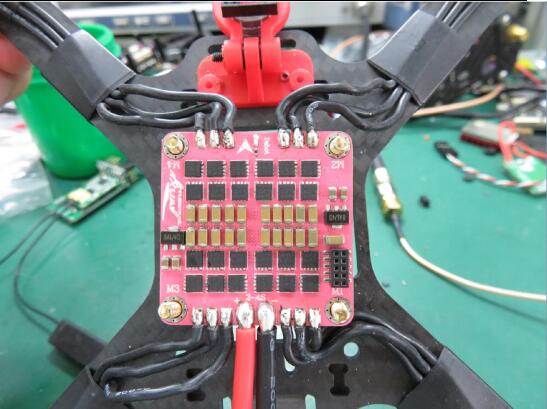
2, Add solder to both sides of the pads of ESC board and allow it to form and penetrate solder. And add the appropriate solder to the motor pad.
3, Solder the power supply cable, as shown in the figure below and position the solder, and you are ready to change the length of the motor cable.
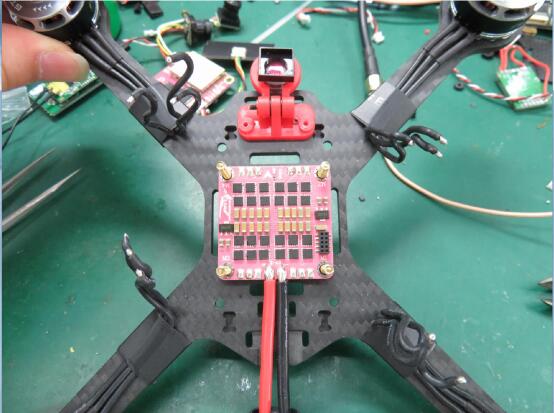
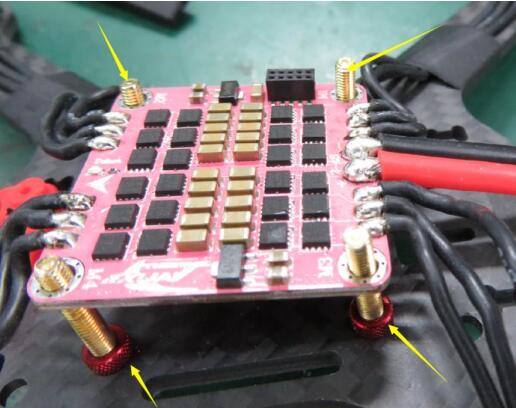
4.Intall 4 motors and the mount the ESC board with the power supply cable to the frame.Then add the solder to the motor cable and solder it with the ECS board.
Package List:
- 1 x Flytower PRO F3 Flight Controller Board


")


")
