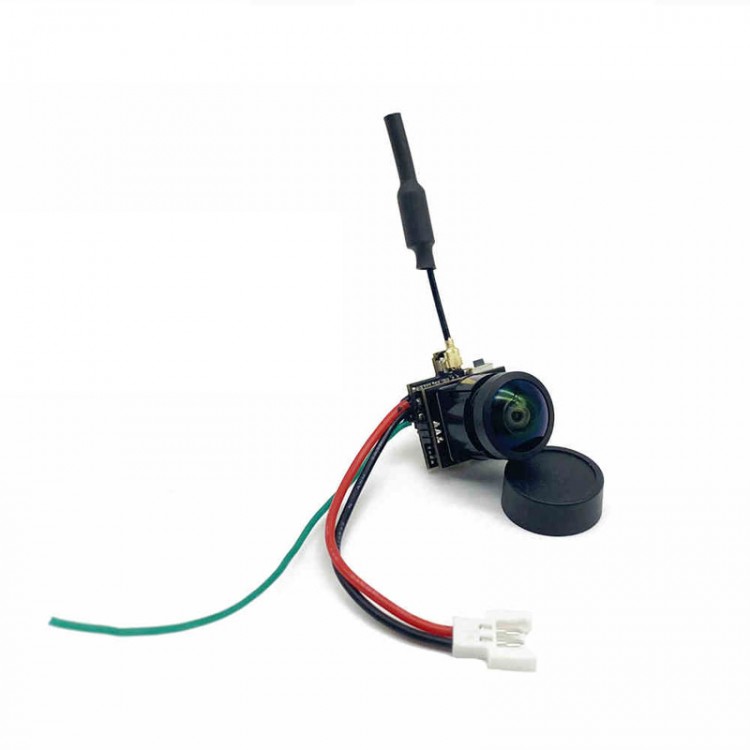
Button Configuration:
Step 1: Long press the button. When the red light flashes once, you can adjust the frequency (CH1-CH8). At this time, short press the button, the blue light flashes once for CH1, the blue light flashes twice for CH2, and so on. Use this method to adjust to the frequency you need.
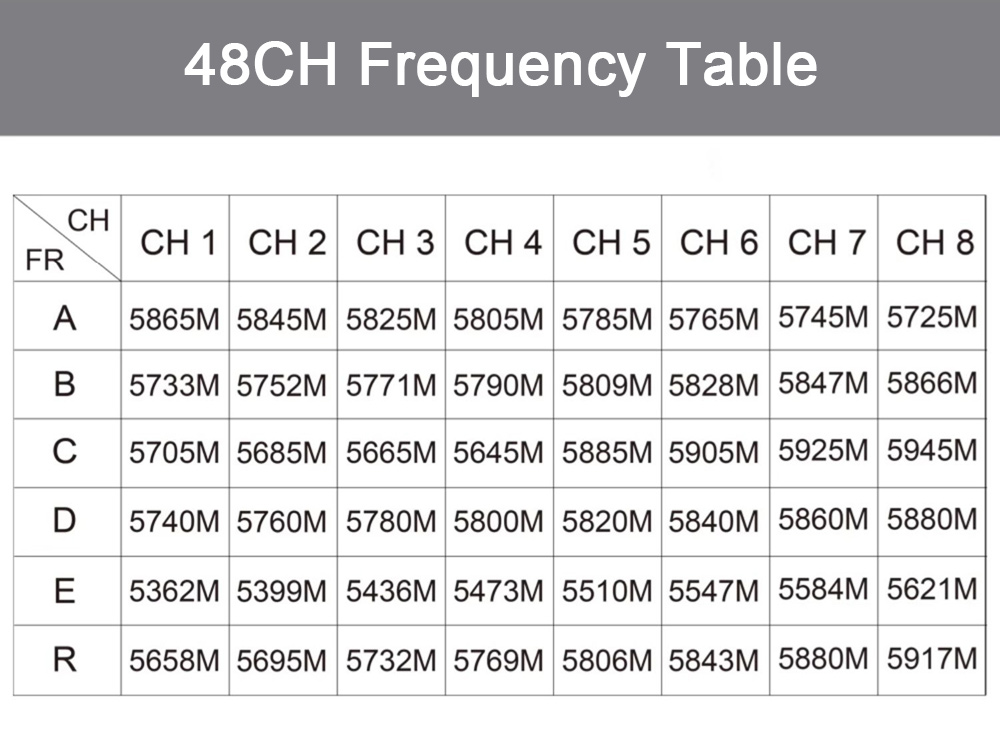
Step 2: Long press the button. When the red light flashes twice, you can adjust the channel group (A-R). At this time, short press the button, the blue light flashes once for channel A, the blue light flashes twice for channel B, and so on. Use this method to adjust to the channel number you need.
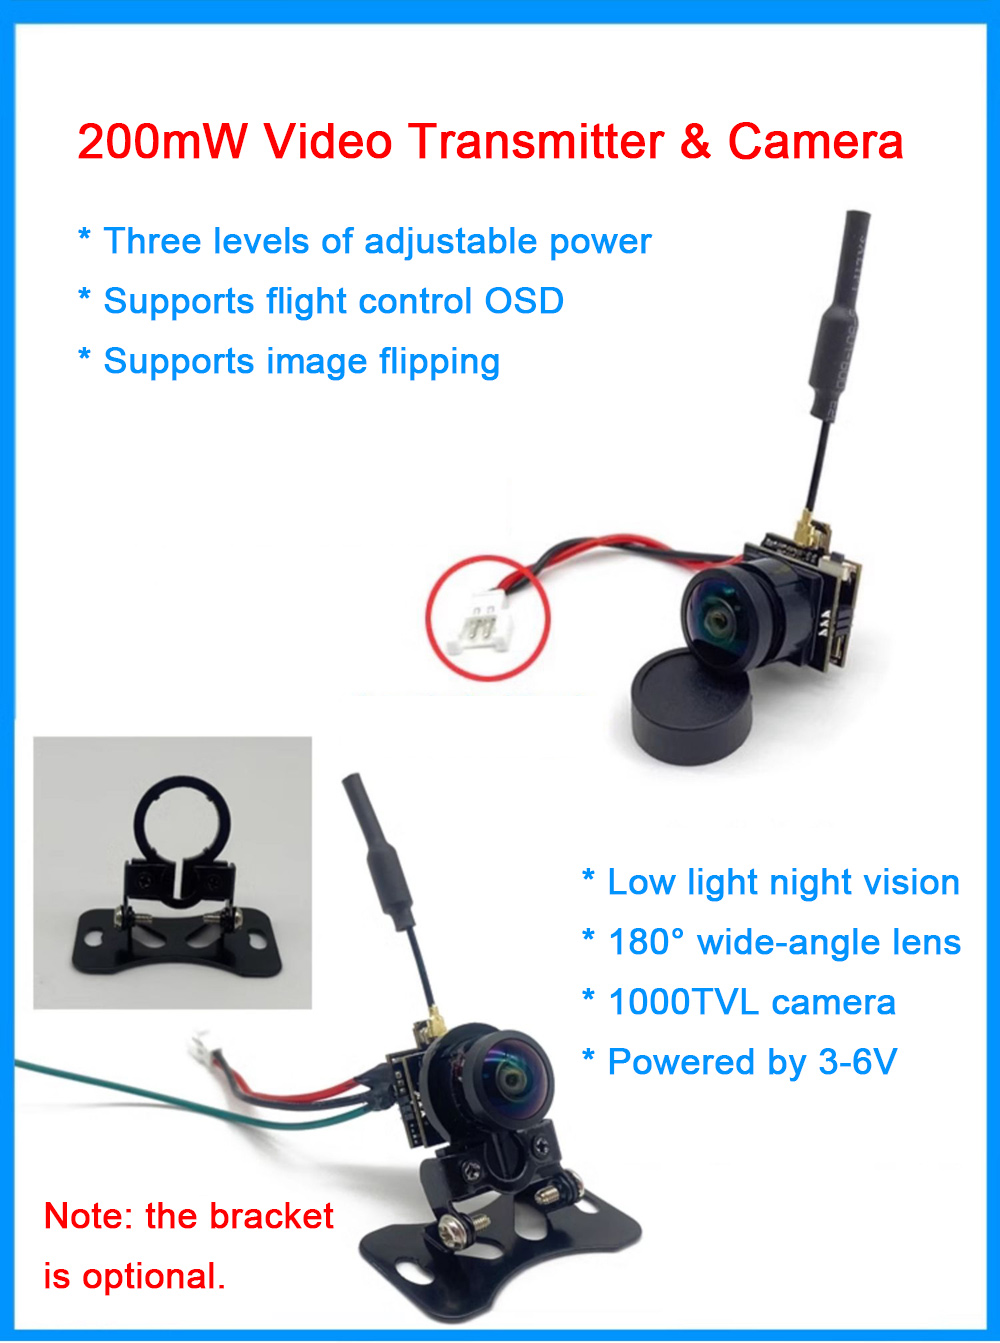
Step 3: Long press the button. When the red light flashes three times, you can adjust the output power. At this time, short press the button, the blue light flashes once for 25mW, the blue light flashes twice for 100mW, and so on. Use this method to adjust to the power you need.
Step 4: Long press the button. When the red light flashes four times, you can flip the image. At this time, short press the button, the blue light flashes once for normal image, and the blue light flashes twice for upside down image. Adjust to the effect you need.
Step 5: Long press the button. When the red light flashes five times, you can adjust the video output format (PAL/NTSC). At this time, short press the button, the blue light flashes once for PAL output, and the blue light flashes twice for NTSC output.
Step 6: Long press the button. The two lights stay on and the settings can be saved.
Attention:
* Steps that do not need to be adjusted can be skipped by long pressing the button.
Pit Mode (generally used for tuning):
* Quickly press the button twice to turn on or off the transmission (Pit mode). The red and blue lights are on at the same time, indicating that the VTX is transmitting. The red and blue lights flash, indicating that the VTX is turned off and the Pit mode is turned on. In Pit mode, its working distance is only 1-2 meters.
 FPV VTX 5.8GHz 3W High Power 64-Channel Video Transmitter Module Compatible with PAL and NTSC
$47.24
FPV VTX 5.8GHz 3W High Power 64-Channel Video Transmitter Module Compatible with PAL and NTSC
$47.24
 RunCam WiFiLink-RX Digital HD Receiver 1080P 90FPS HDMI-compatible Output Support for OpenIPC/Ruby System VTX
$148.55
RunCam WiFiLink-RX Digital HD Receiver 1080P 90FPS HDMI-compatible Output Support for OpenIPC/Ruby System VTX
$148.55
 RunCam WiFiLink2 HD FPV VTX Set 120FPS Based on OpenIPC Support Audio and Video Recording Compatible with MSPOSD/MAVLink
$118.15
RunCam WiFiLink2 HD FPV VTX Set 120FPS Based on OpenIPC Support Audio and Video Recording Compatible with MSPOSD/MAVLink
$118.15


")


