| Quantity | 3+ units | 10+ units | 30+ units | 50+ units | More |
|---|---|---|---|---|---|
| Price /Unit | $14.24 | $13.95 | $13.51 | $12.93 | Contact US |
 Black 3D-Printed Mini ESP32 Marauder Development Board Positioning Module with 1.44-inch Screen
$33.36
Black 3D-Printed Mini ESP32 Marauder Development Board Positioning Module with 1.44-inch Screen
$33.36
 White 3D-Printed Mini ESP32 Marauder Development Board Positioning Module with 1.44-inch Screen
$33.36
White 3D-Printed Mini ESP32 Marauder Development Board Positioning Module with 1.44-inch Screen
$33.36
 MPSoC XCZU19EG-F V0.3 AMR+FPGA Development Board Kit QSFP28 10Gbps Ethernet PCIE3.0 Support for Windows/Linux Systems
$1,537.98
MPSoC XCZU19EG-F V0.3 AMR+FPGA Development Board Kit QSFP28 10Gbps Ethernet PCIE3.0 Support for Windows/Linux Systems
$1,537.98
Product Description:
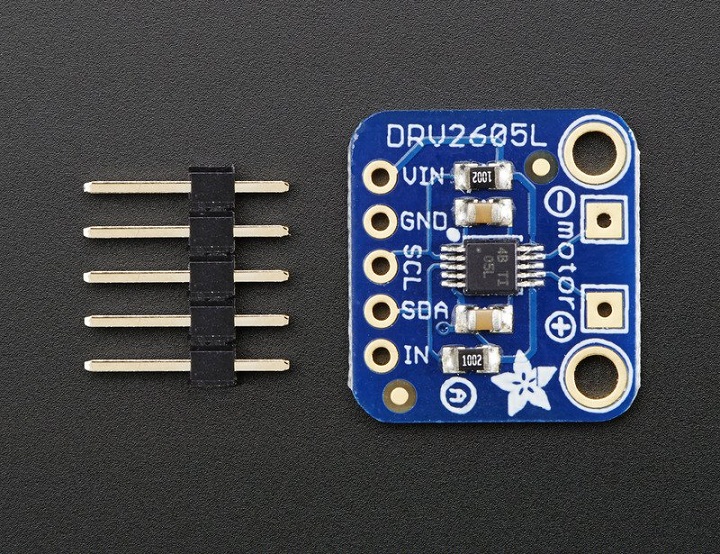
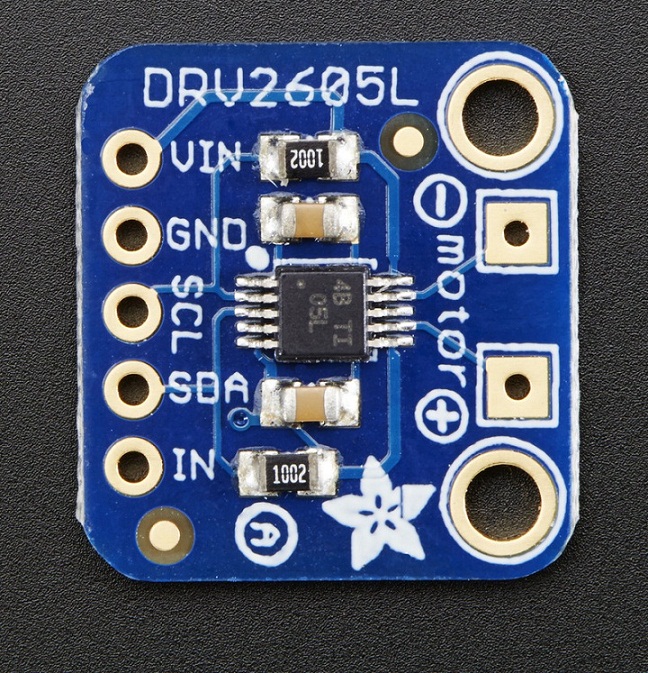
- The DRV2605 from TI is a fancy little motor driver. Rather than controlling a stepper motor or DC motor, its designed specifically for controlling haptic motors - buzzers and vibration motors. Normally one would just turn those kinds of motors on and off, but this driver has the ability to have various effects when driving a vibe motor. For example, ramping the vibration level up and down, 'click' effects, different buzzer levels, or even having the vibration follow a musical/audio input.
- This chip is controlled over I2C - after initialization, a 'string' of multiple effects can be strung together in the chips memory and then triggered to actuate in a row. The built in effects are much much nicer than just 'on' and 'off' and will make your haptic project way nicer feeling.
- According to the product page, it can be used with both LRA (Linear Resonance Actuator) and ERM (Eccentric Rotating Mass) type motors but we have only used it with our little vibration pancake ERM.
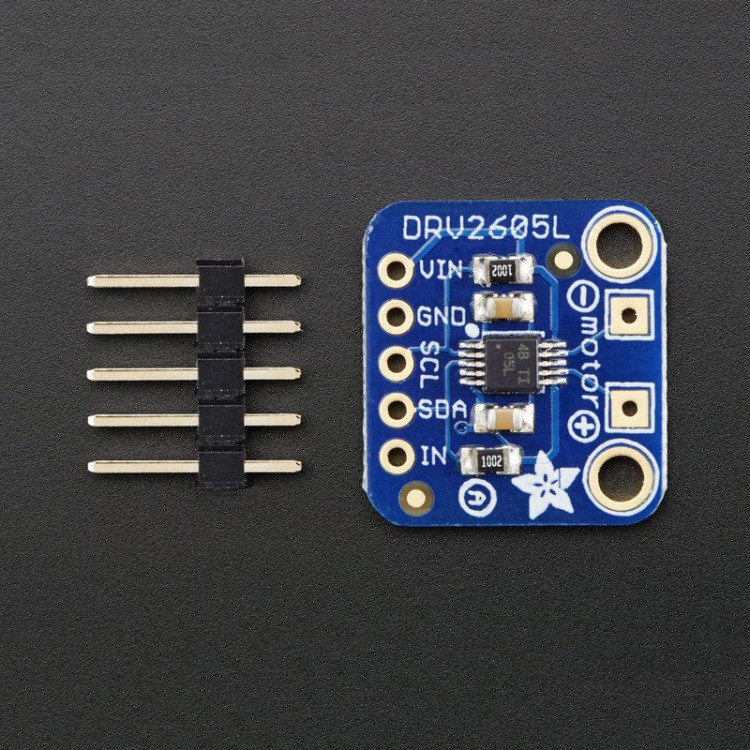
We put this nice chip onto a breakout board. it works with both 3V and 5V power/logic, we have code specifically for Arduino but porting it to any I2C-capable processor should be quite simple. Check it out and get buzzing!
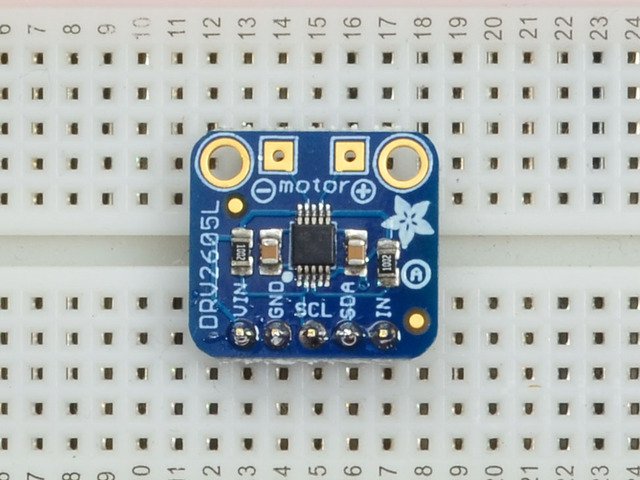
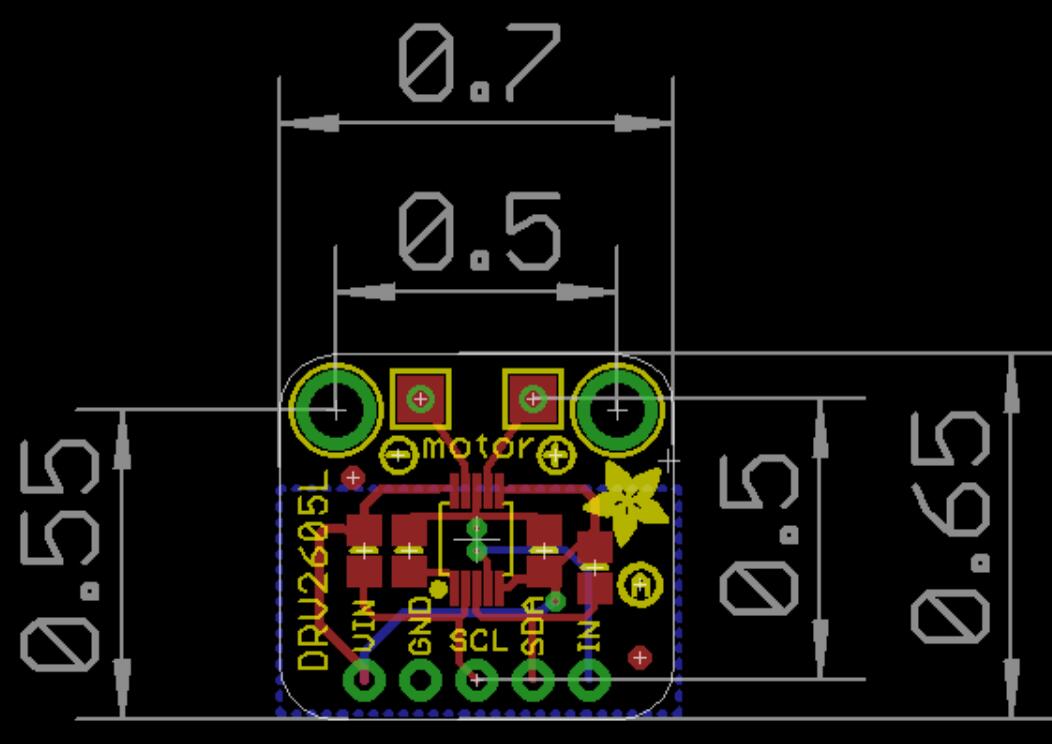
- Power Pins
The motor driver/controller on the breakout requires 3-5V power. You can use either, whichever logic level you use on your embedded processor
Vin - To power the board, give it the same power as the logic level of your microcontroller - e.g. for a 5V micro like Arduino, use 5V
GND - common ground for power and logic
- I2C Pins
SCL - I2C clock pin, connect to your microcontrollers I2C clock line. This pin can be used with 3V or 5V logic, and there's a 10K pullup on this pin.
SDA - I2C data pin, connect to your microcontrollers I2C data line. This pin can be used with 3V or 5V logic, and there's a 10K pullup on this pin.
- Other
IN/TRIG - This is a general purpose pin that can be used for a couple different uses. One use is to read analog audio in to control the audio-to-haptic code. Another use is to 'trigger' the effects to go rather than sending a I2C command.
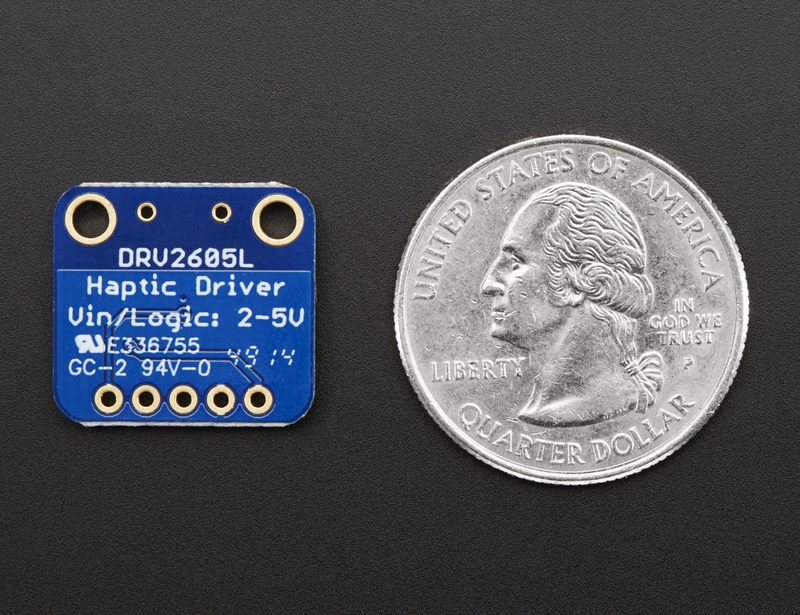
- Dimension:18mm×17mm×2mm / 0.7“×0.7”×0.1“
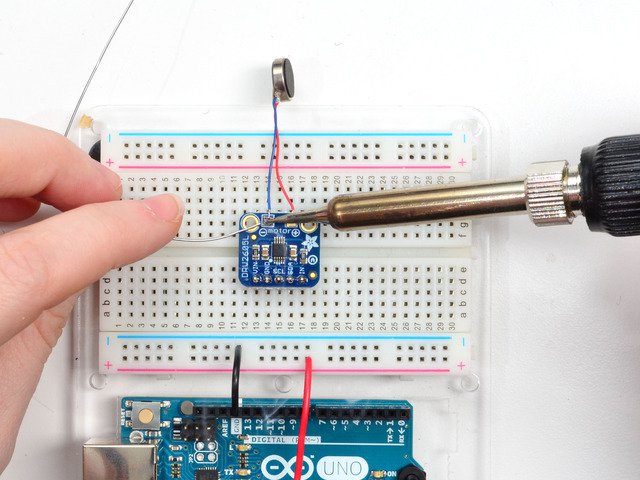
Assembly:
- Prepare the header strip:
Cut the strip to length if necessary. It will be easier to solder if you insert it into a breadboard - long pins down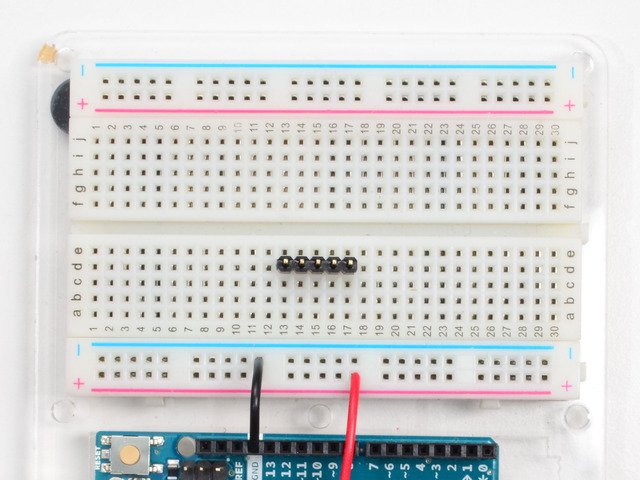
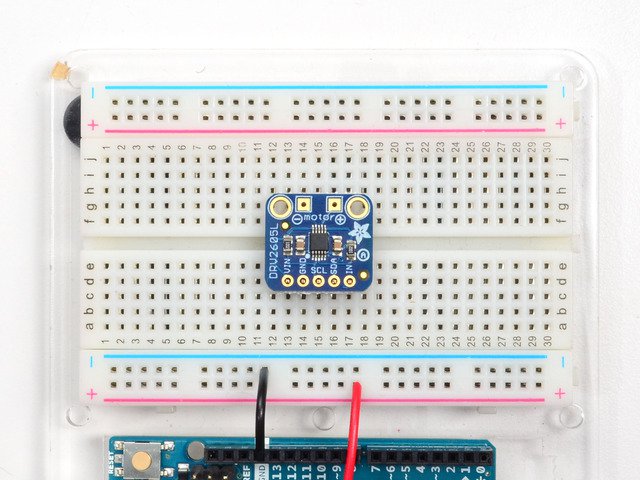
- Add the breakout board:
Place the breakout board over the pins so that the short pins poke through the breakout pads
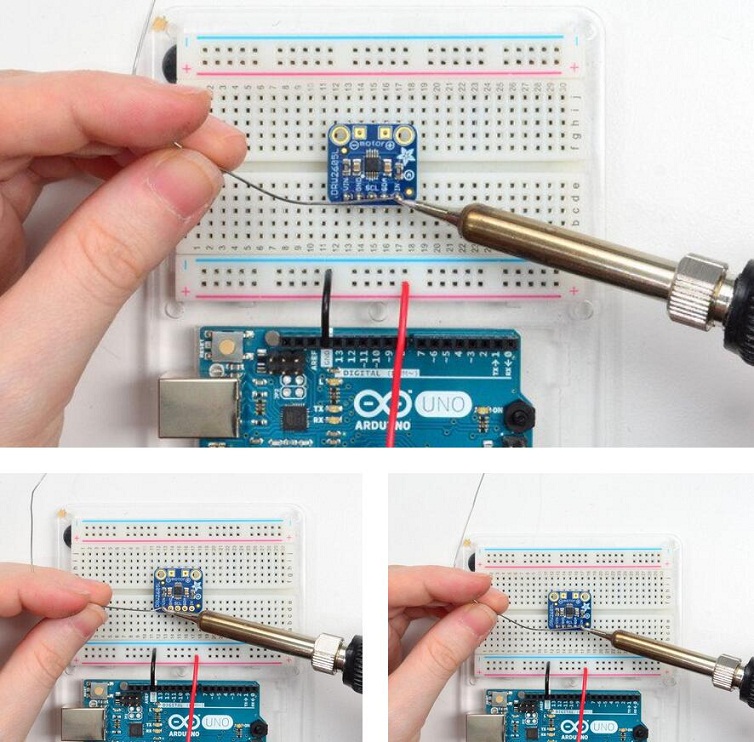
- And Solder!
Be sure to solder all pins for reliable electrical contact.
Solder the longer power/data strip first
(For tips on soldering, be sure to check out our
- You're done! Check your solder joints visually and continue onto the next steps.
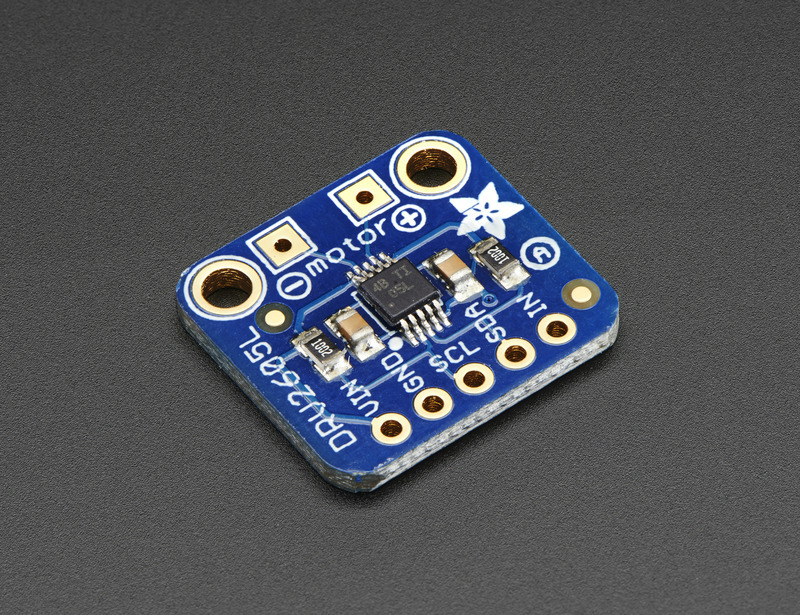
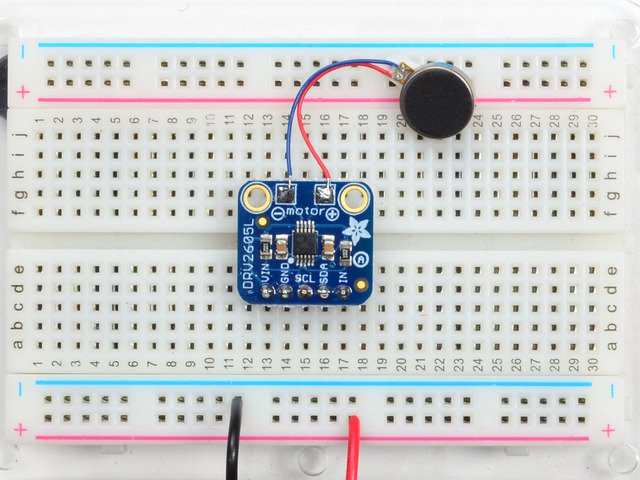
- Attach Motor:
We prefer to attach the little vibration motor directly to the Motor+ and Motor- pads
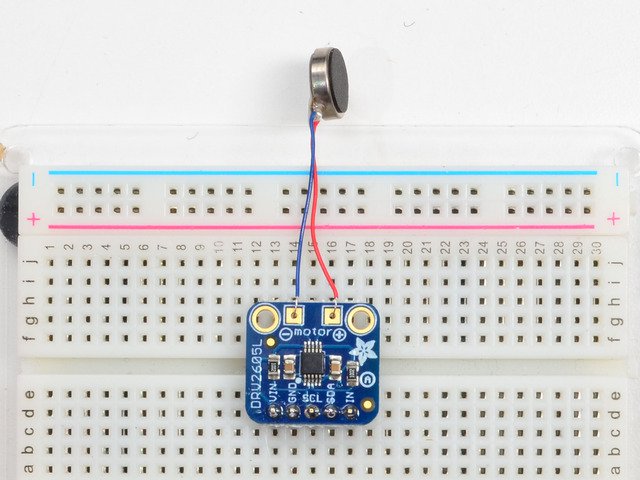
- Solder in place
- Check your work and continue!
Wiring for Arduino:
- You can easily wire this breakout to any microcontroller, we'll be using an Arduino. For another kind of microcontroller, just make sure it has I2C capability, then port the code - its pretty simple stuff!
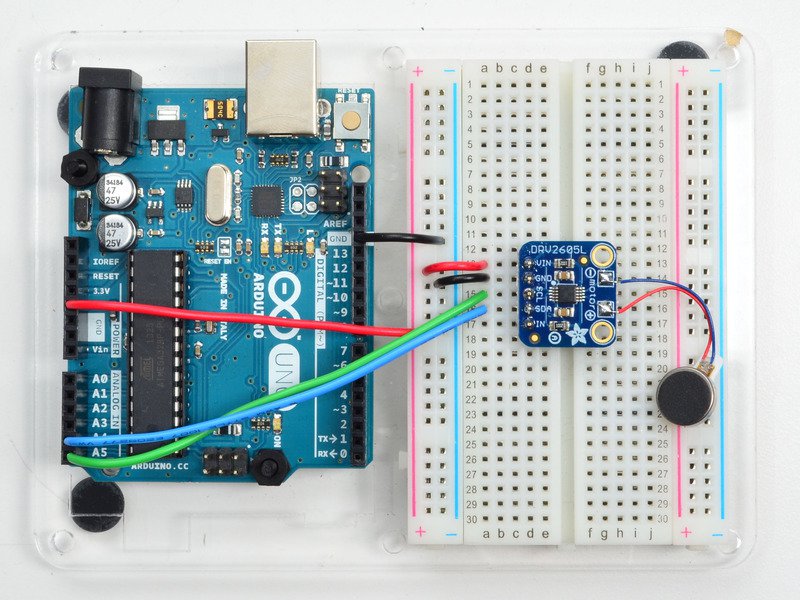
- Connect Vin to the power supply, 3-5V is fine. Use the same voltage that the microcontroller logic is based off of. For most Arduinos, that is 5V
- Connect GND to common power/data ground
- Connect the SCL pin to the I2C clock SCL pin on your Arduino. On an UNO & '328 based Arduino, this is also known as A5, on a Mega it is also known as digital 21 and on a Leonardo/Micro, digital 3
- Connect the SDA pin to the I2C data SDA pin on your Arduino. On an UNO & '328 based Arduino, this is also known as A4, on a Mega it is also known as digital 20 and on a Leonardo/Micro, digital 2
Schematic
Package List:
- 1 x DRV2605 module
- 1 x Arduino Source code
- 1 x Schematic diagram
- 1 x Chip datasheet


 + Raspberry Pi 5 4GB + 25m N10P Lidar + RGB Camera")


