| Quantity | 3+ units | 10+ units | 30+ units | 50+ units | More |
|---|---|---|---|---|---|
| Price /Unit | $62.62 | $61.34 | $59.43 | $56.87 | Contact US |
 High Precision 17-340Nm Torque Tester Digital Display Torque Meter Support Peak/Track Mode Switch
$33.33
High Precision 17-340Nm Torque Tester Digital Display Torque Meter Support Peak/Track Mode Switch
$33.33
 High Precision 10-200Nm Torque Tester Digital Display Torque Meter Support Peak/Track Mode Switch
$30.22
High Precision 10-200Nm Torque Tester Digital Display Torque Meter Support Peak/Track Mode Switch
$30.22
 High Precision 1.5-30Nm Torque Tester Digital Display Torque Meter Support Peak/Track Mode Switch
$30.22
High Precision 1.5-30Nm Torque Tester Digital Display Torque Meter Support Peak/Track Mode Switch
$30.22
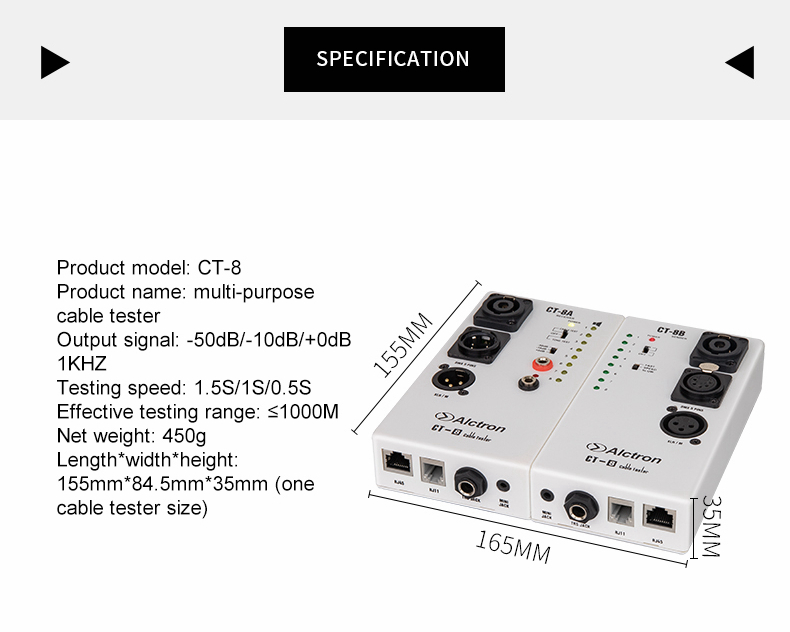
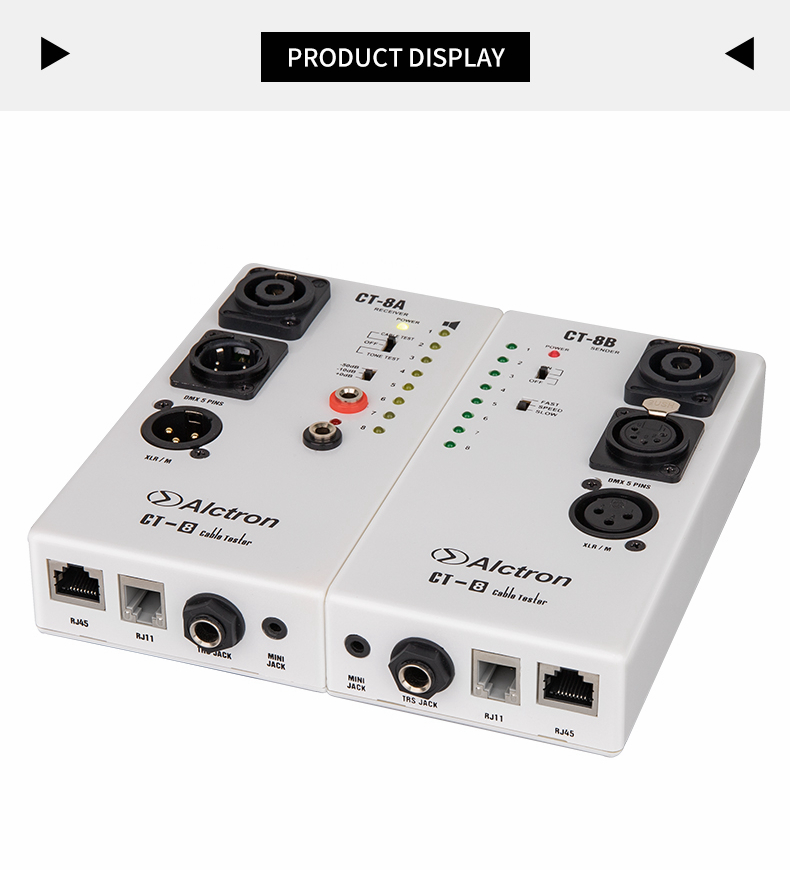
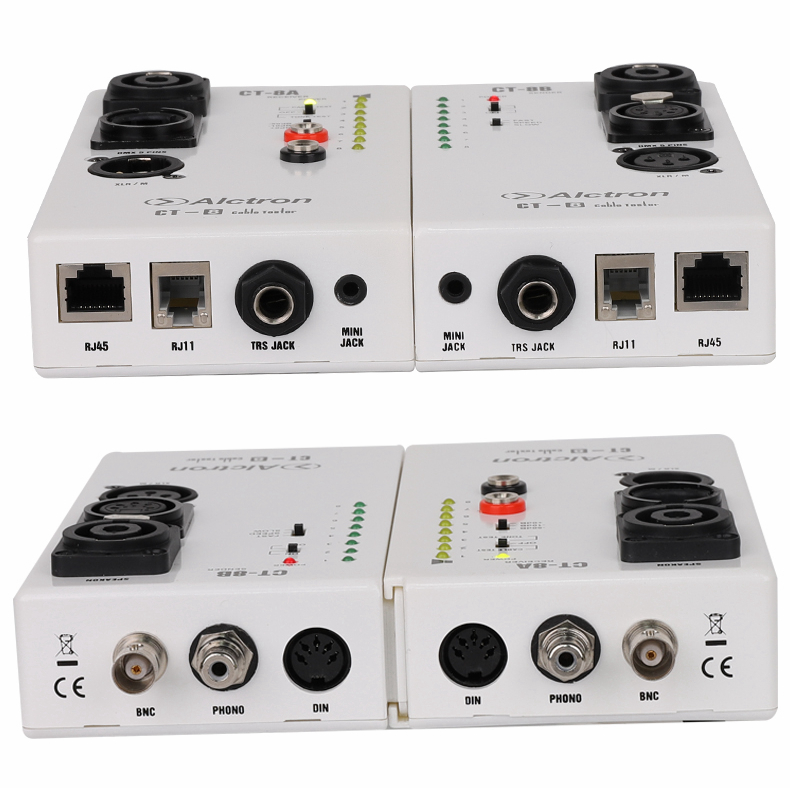
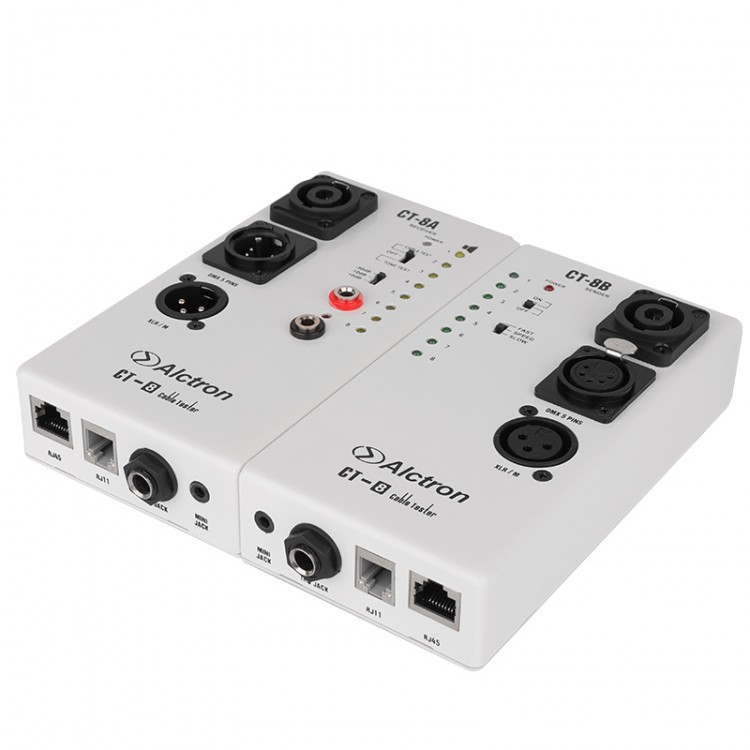
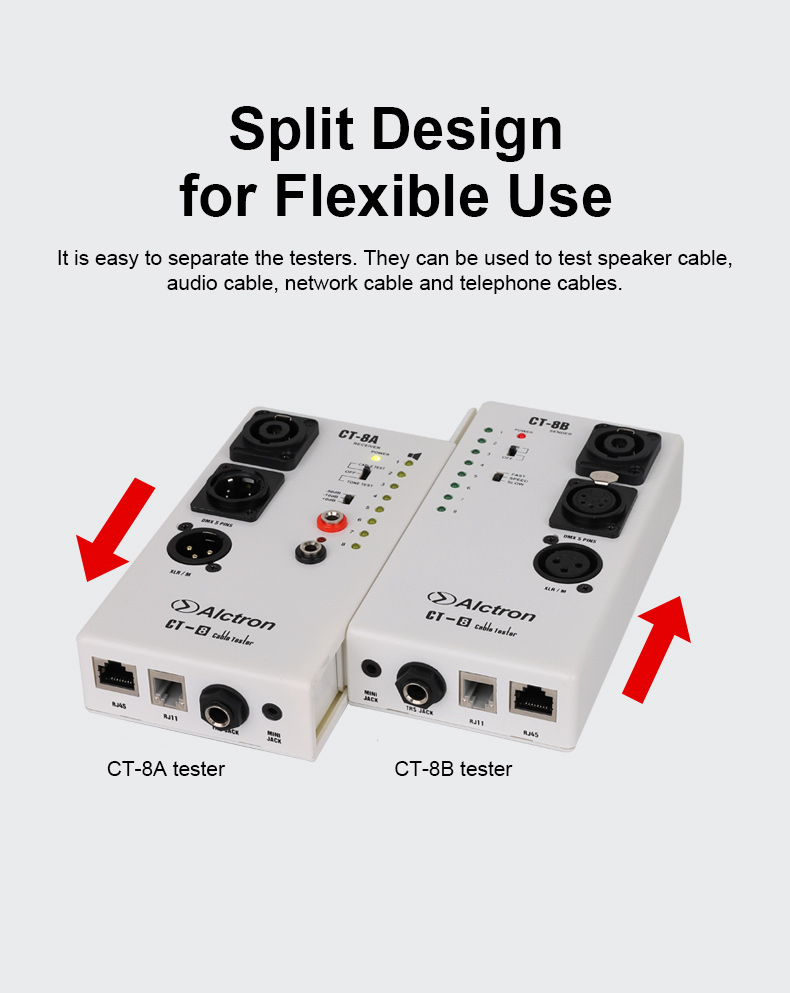
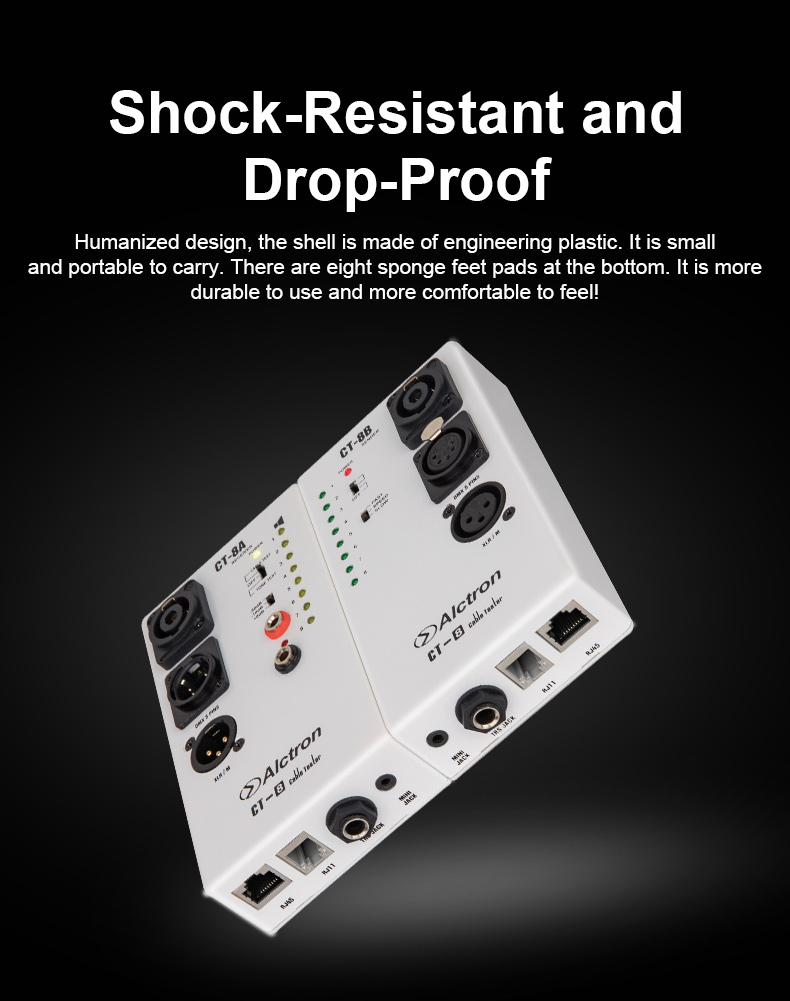
Alctron CT-8 Multi-Purpose Cable Tester Audio Cable Tester for Network Engineering Wiring Tests
Introduction:
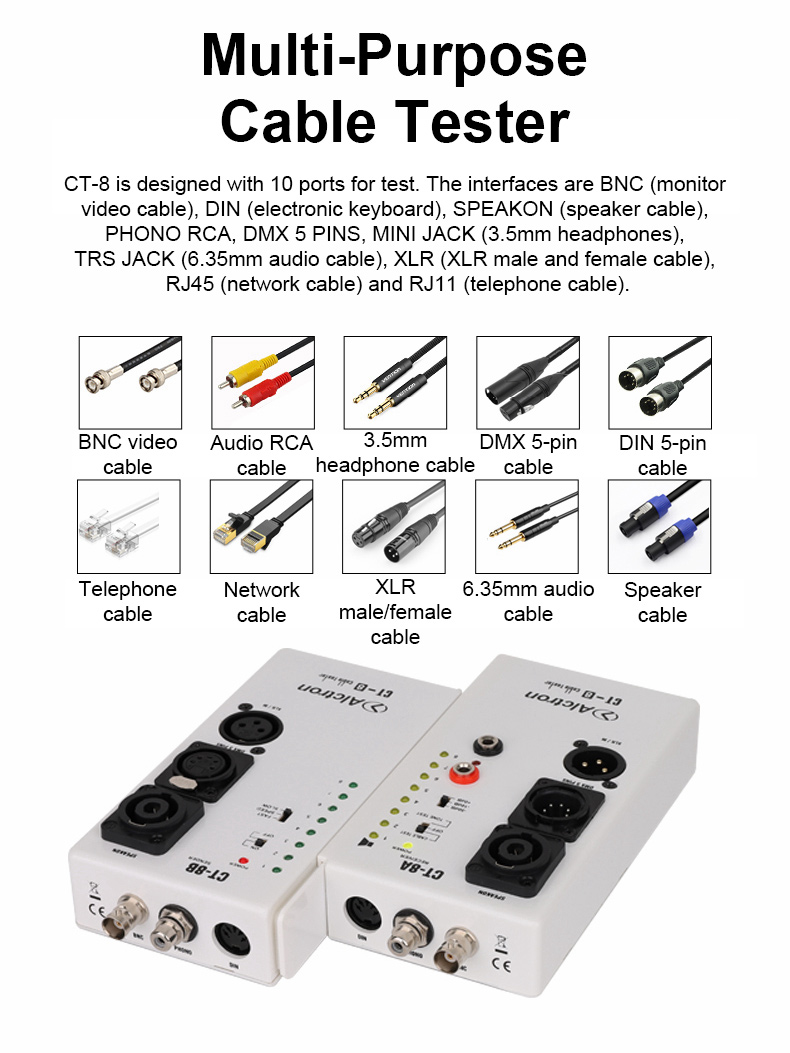
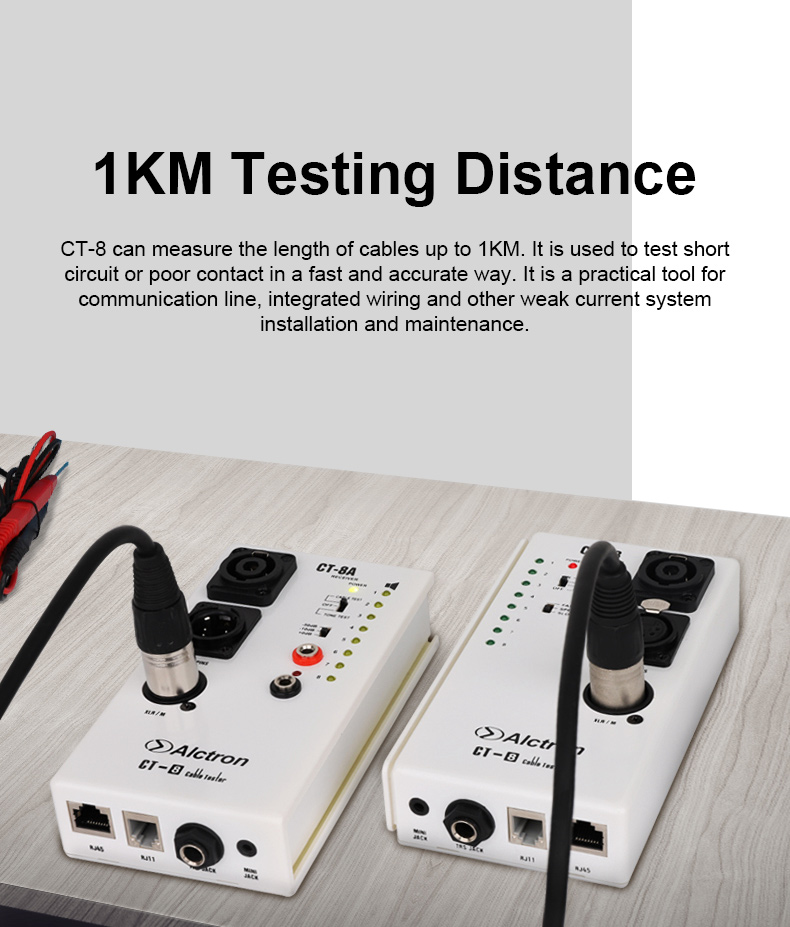
The CT-8 is an intelligent cable tester for use with BNC, PHONO, DIM, SPEAKON, DMX 5 PINS, XLR, RJ45, RJ11, TRS JACK and MINI JACK connectors. Supported test modes include continuity, grounded shield detection and multiple test tones. It is for you who are specialized in stage or recording studio installation, facing to intact stage or equipment but the equipment have no sound or the sound is distortion inexplicable. CT-8 helps you to check whether cables or jacks are connecting properly (short circuit or poor contact tests) to solve the problems.
Package Included:
- 1 x Cable Tester
Note:
- It is powered by DC 9V batteries which are not included in the package.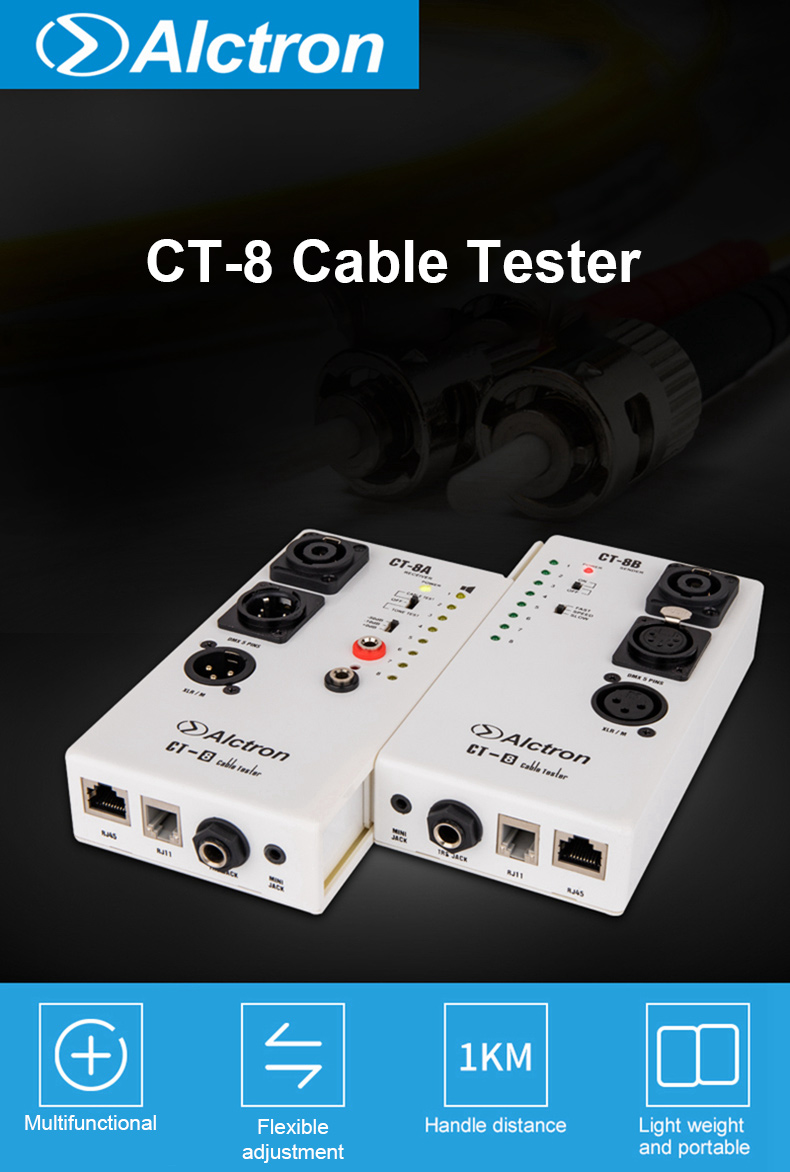

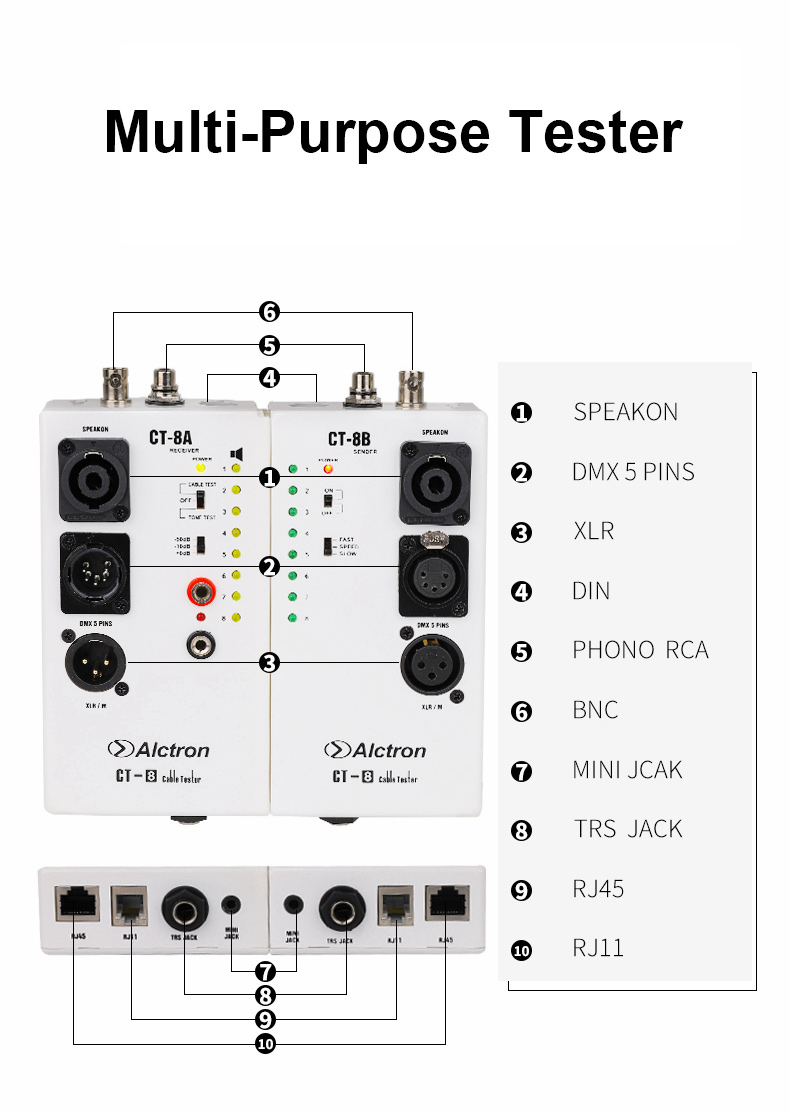
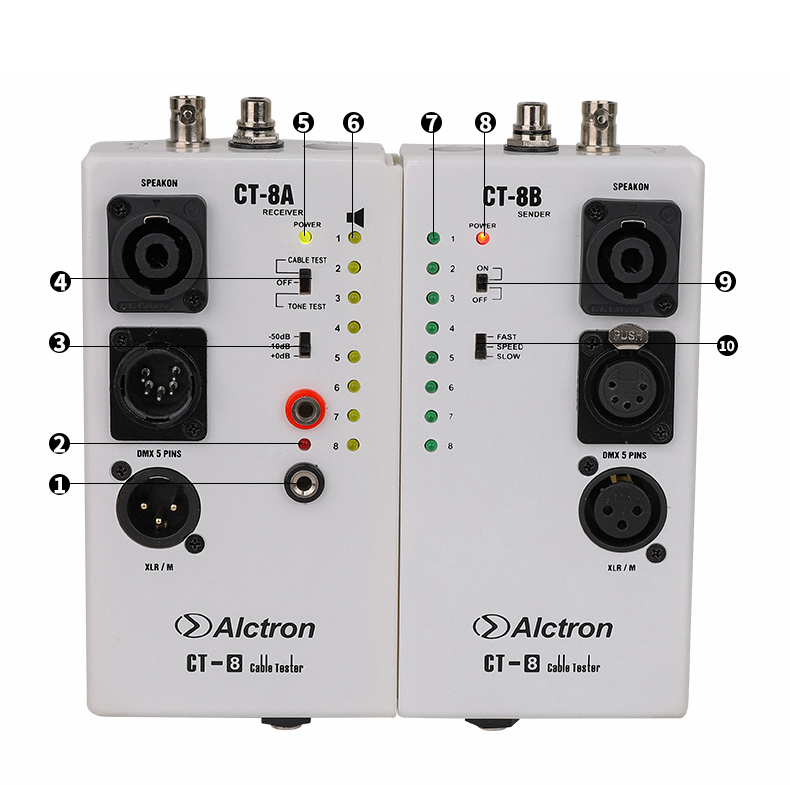
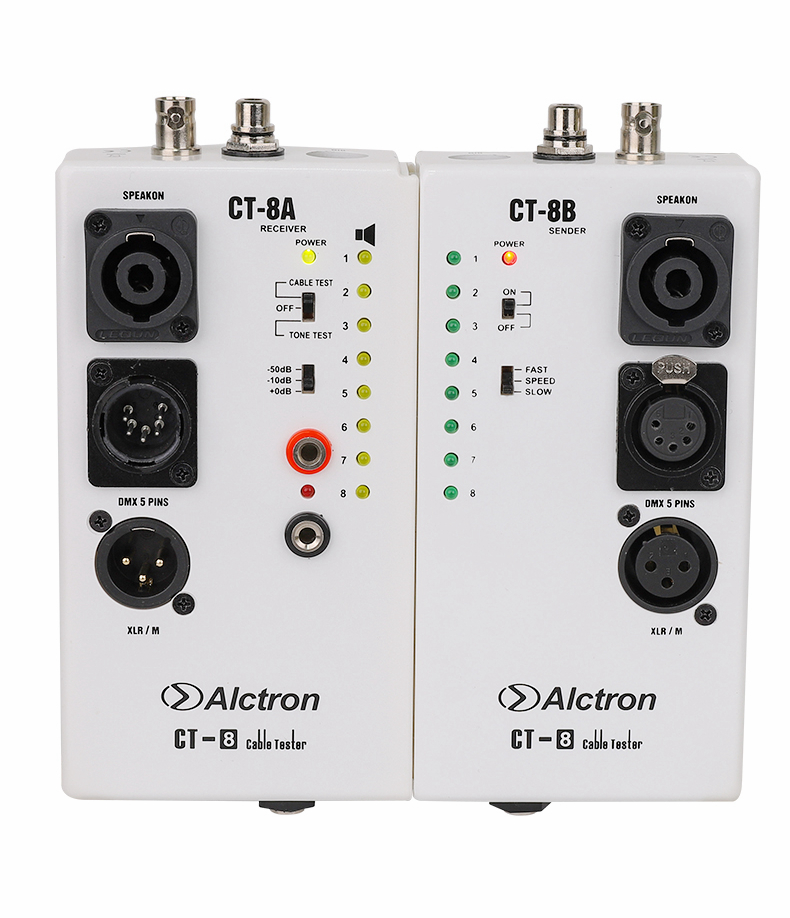
① Probe socket
② Test LED indicator
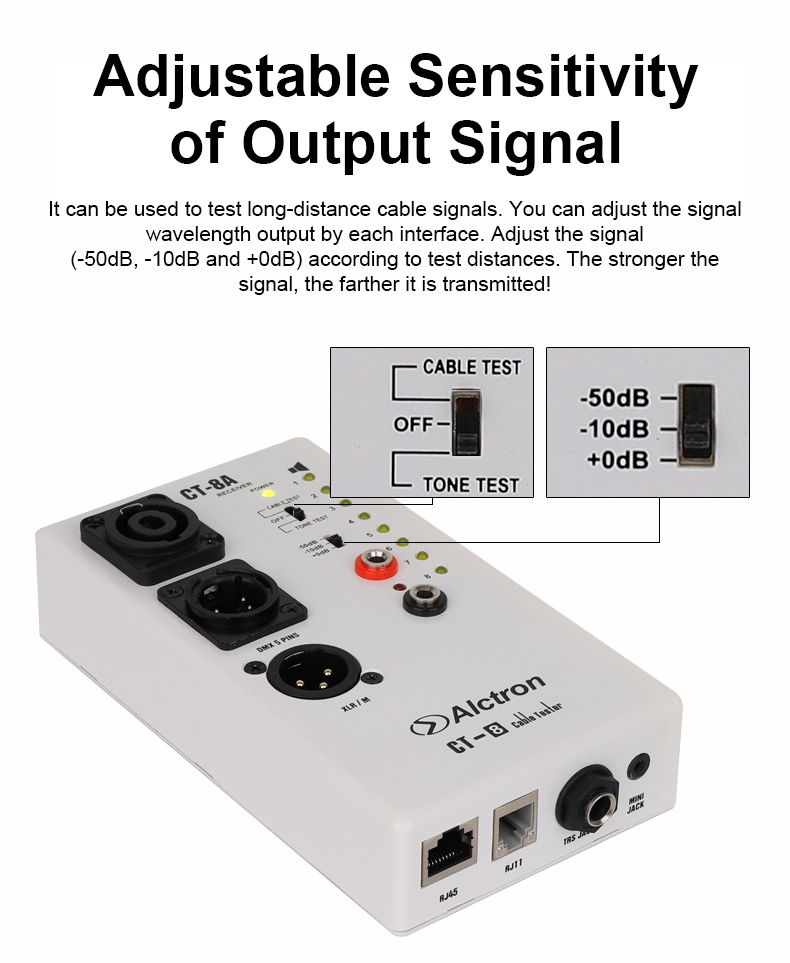
③ Signal sensitivity switch
④ CT-8A test switch/sound switch
⑤ CT-8A power indicator
⑥ CT-8A LED indicator
⑦ CT-8B LED indicator
⑧ CT-8B power indicator
⑨ CT-8B test switch
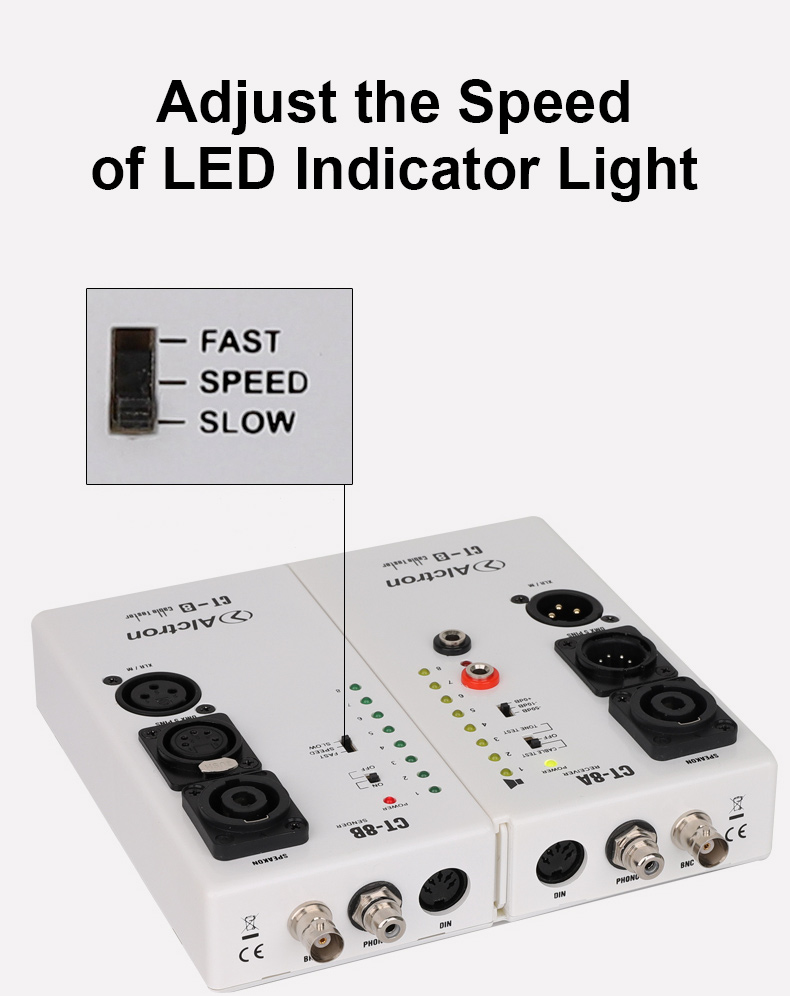
⑩ Cable test speed switch
Attention:
⑤ POWER indicator of CT-8A. When switch ④ is pushed to the CABLE TEST position, the red light will light up. When you push switch ④ to the TONE TEST position, the green light will light up. When this switch is pushed to OFF, the LED light will go off.
③ Signal sensitivity switch (-50DB, -10DB and +0DB): test the long-distance signal wavelength output by each interface. The sound will gradually increase from -50DB TO 0DB. To use this function, you need to push switch ④ to the TONE TEST position.
② Test LED indicator light: When the probe socket is connected, the LED red light will light up.
⑩ Cable test speed switch (FAST-SPEED-SLOW): The FAST position is for tests every 0.5s, the SPEED position is for tests every 1sm and the SLOW position is for tests every 1.5s.
Instructions:
Take the test of XLR cable as an example:
1. Install 2pcs 9V batteries into CT-8A and CT-8B.
2. Connect the two ends of the XLR cable to CT-8A and CT-8B, respectively.
3. Turn on the test switch of CT-8B, you can see that the three green lights of CT-8B are on, and the remaining five LED indicators are not on (Note: If the test cable is not connected well, the green light will not light up).
4.Turn on the test switch of CT-8A, you can see that the three yellow LED lights of CT-8A will be on, and the remaining five LED indicators will not light up (Note: If the test wire is not connected well, the indicator will not light up). You will hear a beep when detecting PIN1 (Note: the PIN1 pin of the test cable is good so that it can be tested properly. If you don't hear sound or see the LED light light up when you test, PIN1 is bad).
5. After the above steps, even if the two devices are separated, you can know the quality of the measured cables through the situation reflected on one of the cable testers. The situation shown on the CT-8A is the connection of the tested cable. For example, the XLR pins are arranged as PIN132 instead of PIN123. You will hear a beep when PIN1 is being tested, and then look at PIN3 and PIN2, so you will know if the tested cable is arranged correctly. If the XLR cable PIN2 is connected incorrectly, you will hear a PIN1 beep and the yellow light for PIN1 will illuminate. You can't hear the beep of PIN2 or see the LED light of PIN2. The test method of PIN3 is the same as that of PIN1.
Note: The test method for other cable is the same as that of the XLR cable. When the batteries are about to run out, please replace them in time to avoid affecting the normal use of the device!