| Quantity | 3+ units | 10+ units | 30+ units | 50+ units | More |
|---|---|---|---|---|---|
| Price /Unit | $29.67 | $29.07 | $28.16 | $26.95 | Contact US |
 T-708 15KV Multifunctional High Precision Cable Fault Intelligent Detector with Adjustable High-voltage Output
$779.92
T-708 15KV Multifunctional High Precision Cable Fault Intelligent Detector with Adjustable High-voltage Output
$779.92
 T-708 10KV Multifunctional High Precision Cable Fault Intelligent Detector with Adjustable High-voltage Output
$702.19
T-708 10KV Multifunctional High Precision Cable Fault Intelligent Detector with Adjustable High-voltage Output
$702.19
 DM40B Standard Version 10Hz-50MHz Portable Digital Multimeter Oscilloscope Signal Generator with Magnetic PVC Sleeve
$124.94
DM40B Standard Version 10Hz-50MHz Portable Digital Multimeter Oscilloscope Signal Generator with Magnetic PVC Sleeve
$124.94
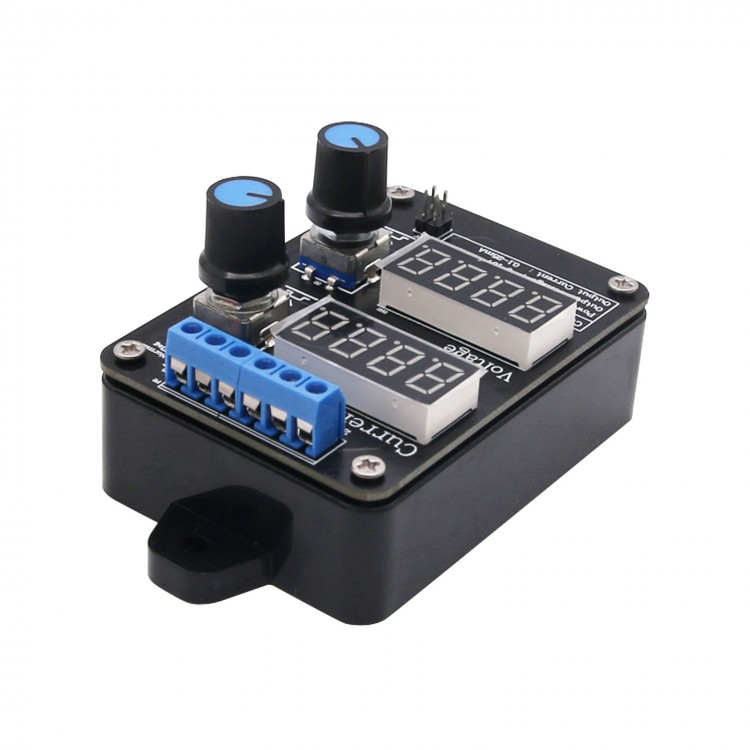
Current Voltage Signal Generator 0-5V-10V 0-4-20mA Analog Constant Current Source Debugging KW_VCG002
Description:
KW_VCG002 is a small current voltage signal generator that can generate 0-20mA current signal and 0-10V voltage signal. It has the functions of anti-reverse connection of input voltage, data saving by power failure (no operation for 6 seconds, parameters will be automatically saved), current output indicator.
It is easy to use the module. Data is input through the code switch and output signal is updated immediately. This module is cost-effective and can be used by various manufacturers, companies, universities, and research institutions.
Specifications:
- Module Power Supply: DC 18-30V
- Current Output: 0.01-25.00mA
- Current Accuracy: ±0.008mA
- Output Maximum Load: 500Ω
- Voltage Output: 0.000-10.000V
- Voltage Accuracy: ±0.003V
- Voltage Output Load Capacity: 30mA
- Step Value: Current 0.01mA; Voltage: 0.005V
- PCB Board Size: 83 x 58mm
- Shell Size: 83 x 58 x 33mm
- N.W.: 78.9g 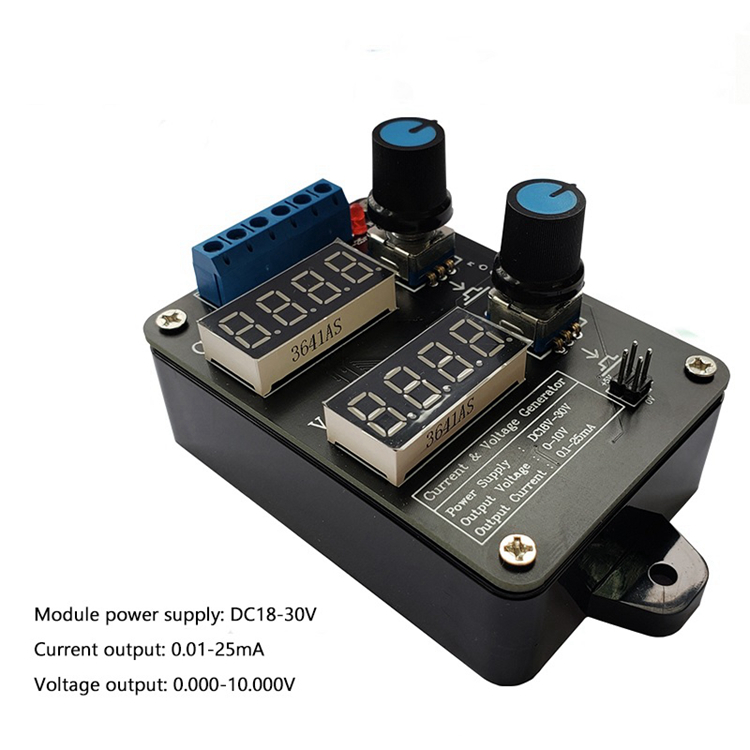
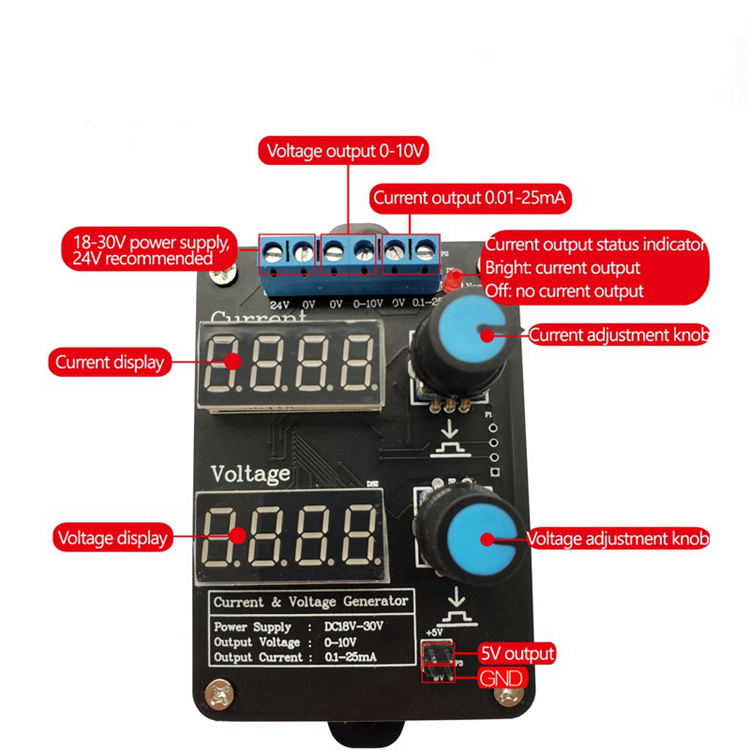
Voltage Output Adjustment:
- Turn the voltage knob clockwise to increase the output voltage and counterclockwise to decrease the output voltage. Press the knob to select the digit to be adjusted. The digit selected at this time will flash.
Voltage Output Calibration:
- 1. Record the real output voltage of 0.5V and 10V separately. For example, the actual measured outputs are 0.46V and 9.85V, respectively.
- 2. Adjust the displayed voltage to be 0.5V. Press the voltage knob for 5s or more to enter into the first calibration point. After entering, adjust the calibration data to be 0.46, then press the voltage knob for 5s to exit the first calibration point.
- 3. Adjust displayed voltage to be 10V. Then press the voltage knob for 5s or more to enter into the second calibration point. After entering, adjust the calibration data to be 9.85, then press the voltage knob for 5s to exit the second calibration point.
- 4. The voltage calibration process is finished.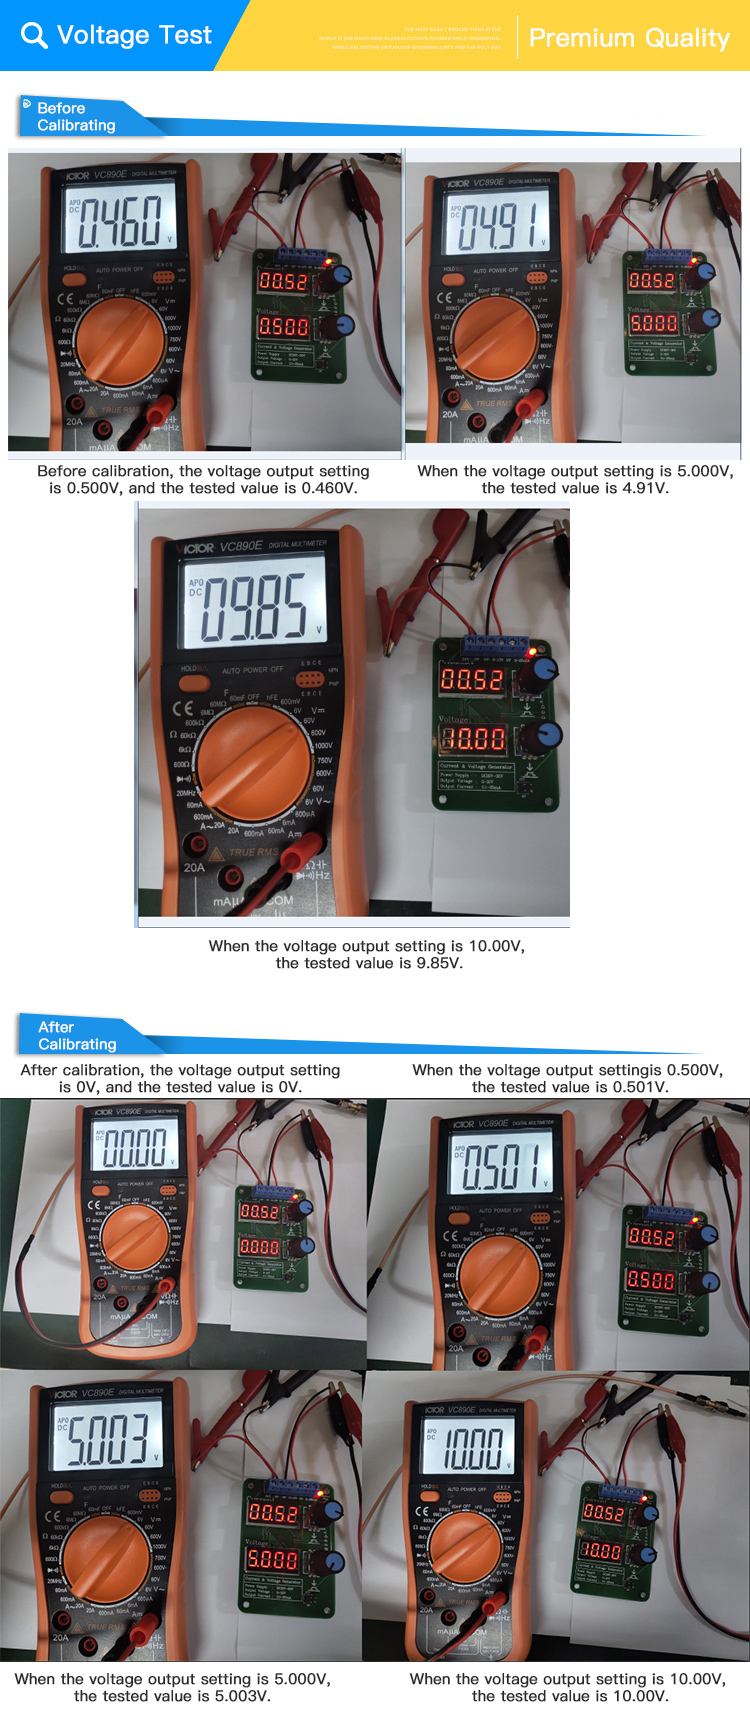
Current Output Adjustment:
- Turn the current knob clockwise to increase the output current and counterclockwise to decrease the output current. Press the knob to select the digit to be adjusted. The digit selected at this time will flash.
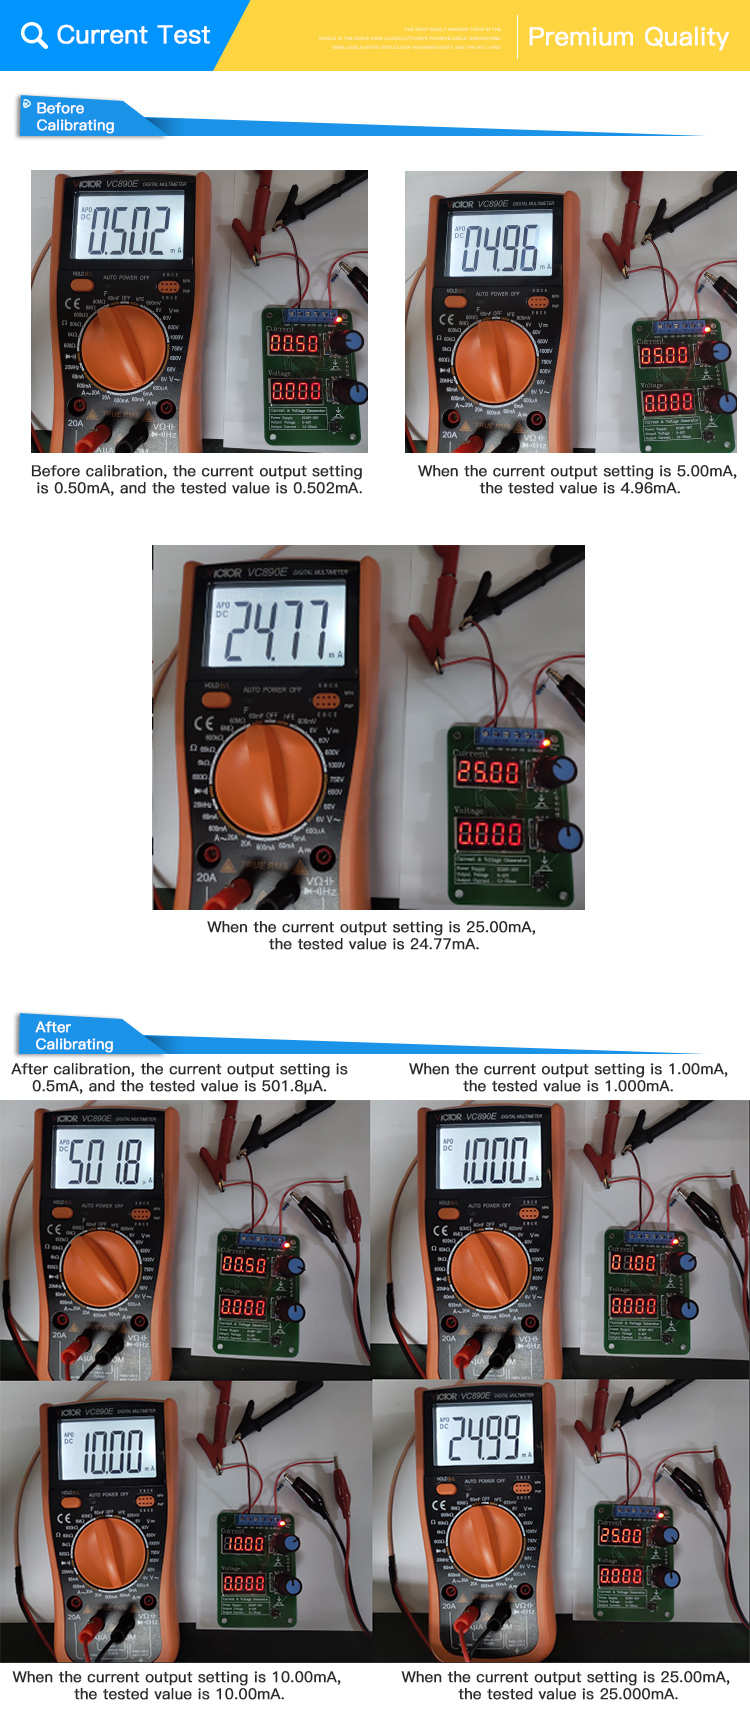
Current Output Calibration:
- 1. Record the real output current of 0.5mA and 20mA separately. For example, the actual tested outputs are 0.502mA and 24.77mA, respectively.
- 2. Adjust the displayed current to be 0.5mA. Press the current knob for 5s or more to enter into the first calibration point. After entering, the calibration data is adjusted to 0.50 (the last digit can be rounded off). Then press the current knob for 5s to exit the first calibration point. If users cannot measure the output data of 0.5mA, the data of the first calibration point can be directly set to 0.50.
- 3. Adjust the displayed current to be 20mA. Press the current knob for 5s or more to enter into the second calibration point. After entering, adjust the calibration data to be 24.77. Then press the current knob for 5s to exit the second calibration point.
- 4. The current calibration process is finished.