| Quantity | 3+ units | 10+ units | 30+ units | 50+ units | More |
|---|---|---|---|---|---|
| Price /Unit | $636.35 | $623.37 | $603.89 | $577.91 | Contact US |
 iFlight Defender 25DJI O3 HD 4S Cinewhoop Digital Transmission FPV Racing Drone BNF TBS RX
$604.96
iFlight Defender 25DJI O3 HD 4S Cinewhoop Digital Transmission FPV Racing Drone BNF TBS RX
$604.96
 iFlight Defender 25DJI O3 HD 4S Cinewhoop Digital Transmission FPV Racing Drone BNF ELRS 868/915MHz RX
$580.08
iFlight Defender 25DJI O3 HD 4S Cinewhoop Digital Transmission FPV Racing Drone BNF ELRS 868/915MHz RX
$580.08
 iFlight Defender 25DJI O3 HD 4S Cinewhoop Digital Transmission FPV Racing Drone BNF ELRS 2.4G RX
$580.08
iFlight Defender 25DJI O3 HD 4S Cinewhoop Digital Transmission FPV Racing Drone BNF ELRS 2.4G RX
$580.08
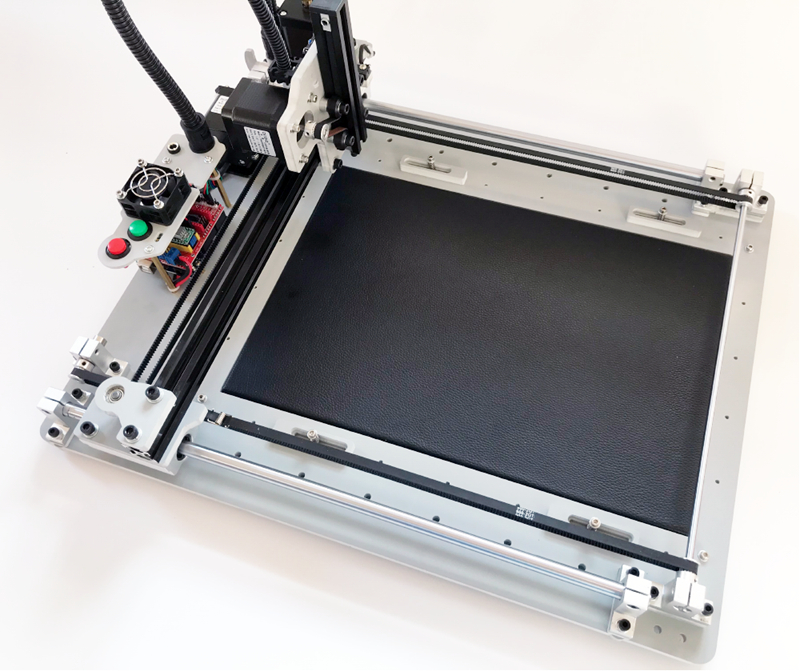
Emile3 3-Axis Mechanical Arm Robot Arm Gantry Style Structure Assembled For Touch Screen Test CNC
Specifications:
- 3-Axis: X, Y, and Z (linear; gantry structure)
- Positioning Method: Space coordinate XYZ
- Machine Dimensions: 490 x 390 x 200 mm (L*W*H)
- Maximum Movement Stroke: X: 320mm; Y: 245mm; Z: 55mm
- Max. Speed of Each Axis: 15000mm/m (coordinated motion on three axes)
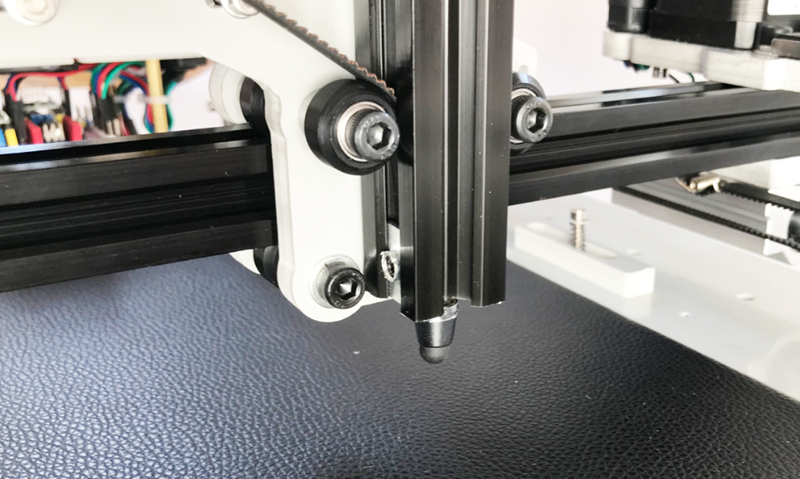
- Minimum Ground Clearance of Structure: 35mm (Attention: It is measured from the machine's supporting plate which can be removed for a higher clearance in a hollow manner.)
- Maximum Ground Clearance at the End of Z Axis: 50mm (Attention: It is measured from the machine's supporting plate which can be removed for a higher clearance in a hollow manner.)
- Accuracy: 0.1mm
- Z-Axis Protection: Bidirectional protection for maximum and minimum strokes
- Power: Peak 72W; operating environment 12V, 5V (With 12V power supply. 5V comes from your PC)
- Host Computer: Computer runs Grbl control, the host computer control (Computer outputs G code command control)
- Hardware: Lower computer is open source Grbl code
- Emile3 Connected to PC: Connect via USB. Install driver for Arduino
- Control Way: G code control
- Control Hardware: For Arduino UNO R3
- Stepper Driver: A4988
- Machine Weight: 6.1 kg
Package Included:
- 1 x Set of 3-Axis Mechanical Arm Assembled
Note:
- It is finished and ready to use.
- Emile3 is a complete set, including upper computer software and lower computer system. Customers can install driver for Arduino and connect it to power supply to work. It is suitable for touch screen detection, clicking, pressing buttons and other jobs. 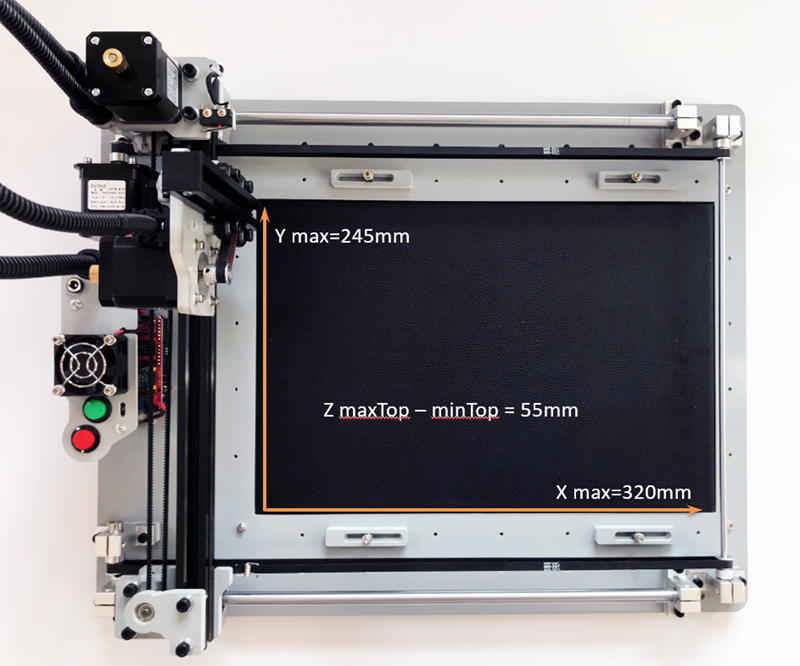

Emile3's Control:
- Emile3 can be controlled with commonly used Gcode sender software, such as Grbl controller software. We also have a host computer software Emile3 Control Software customized for Emile3. Software features:
- Edit action program suitable for software teaching mode, make measurement more convenient, move to record
- Infinite loop and limited loop control
- With random delay control
- Faster and more convenient setting of common parameters
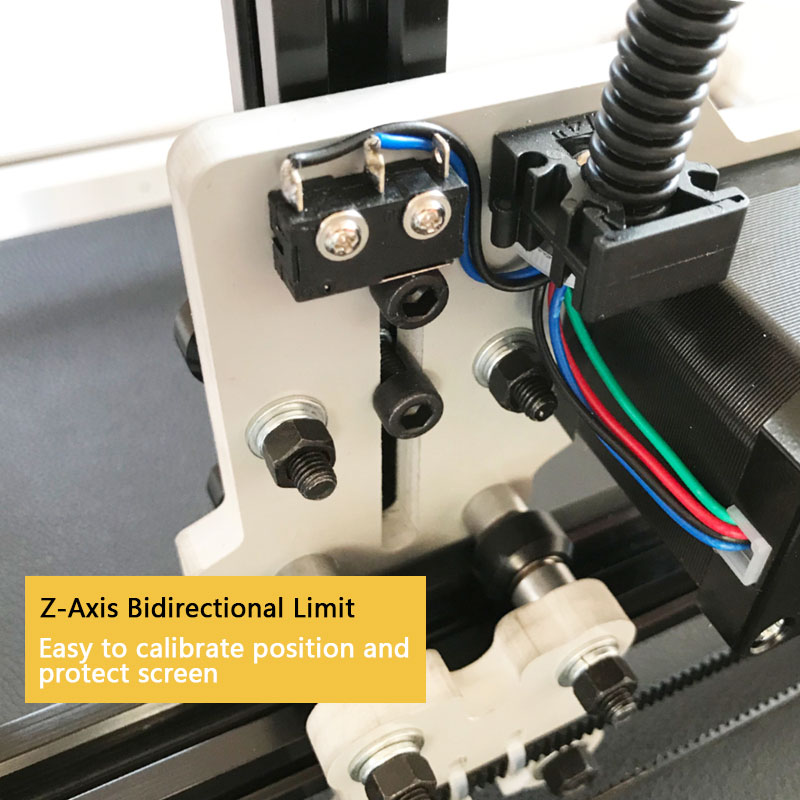
Practical Z-Axis Bidirectional Safety Limit: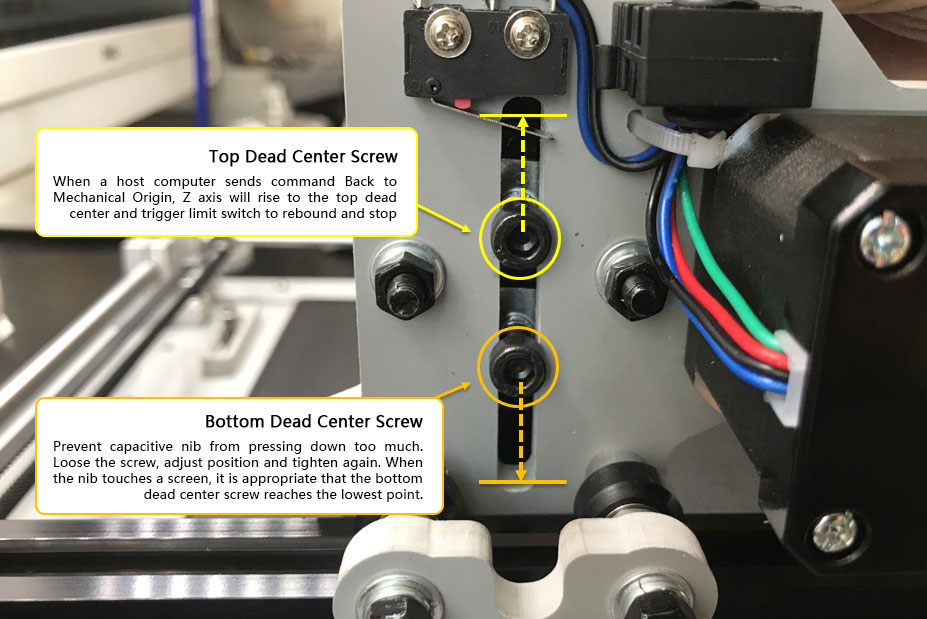
Function of Upper Limit:
It can cooperate with the Back to Mechanical Origin or $ H command sent by the host computer software. When a host computer sends Back to Mechanical Origin command, Z axis moves upward, and the contact moves away from touch screen until it rises to upper limit screw and triggers the limit switch of Z axis. After 5mm rebound, it stops. XY axes start to search for limit switches, until these two axes trigger their respective limit switches and rebound by 5mm, and then stop moving. This point is the fixed position of touch nib with respect to the desktop. With G92 command, it can be used to correct position.
For example, a host computer sends a command: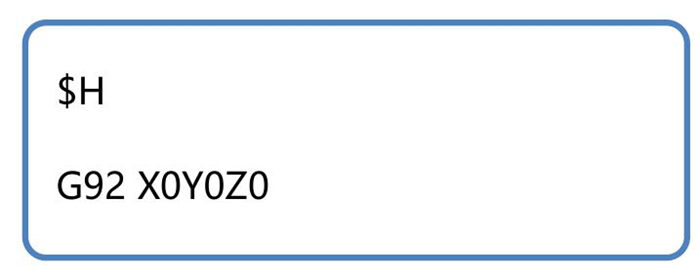
After executing two G code commands, the point is the corrected position, namely, X = 0, Y = 0, Z = 0. If the point is not the X0Y0Z0 point that we edited, you can also set the point as the coordinate of relative custom zero point. For example, the coordinate of mechanical origin relative to the custom origin is X = -50, Y = 30, Z = 10, and the upper computer sends a command: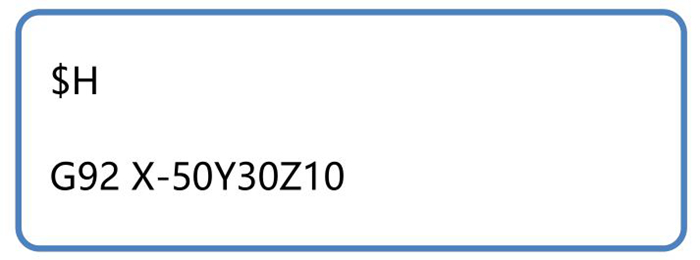
If you can refer to the Back to Mechanical Origin position during the action editing process, it will provide another guarantee for long-term automatic operation.
Function of Lower Limit:
Prevent the Z axis from going down too much and the contacts may damage your screen. Users can adjust the downward limit screw. When capacitive pen touches a screen, it is appropriate that the bottom dead center limit screw reaches the lowest point. Even if the movement instruction is wrongly operated or the resistance is lost during the running process, the contact will not push the screen too much, which will protect the screen.
Disadvantages of Two-way Limit:
The bidirectional limit adjustment screw occupies the total stroke of Z axis. The total travel of Z axis from the lowest point to the highest point is 60mm. The distance between the two-way limit screws will occupy part of the stroke:
Remaining effective stroke (highest point - lowest point) = total stroke (60mm) - distance between two screws
If only one limit screw is used, the limit switch is triggered upwards, and the lowest limit point is touched down, and the stroke can reach 55mm.
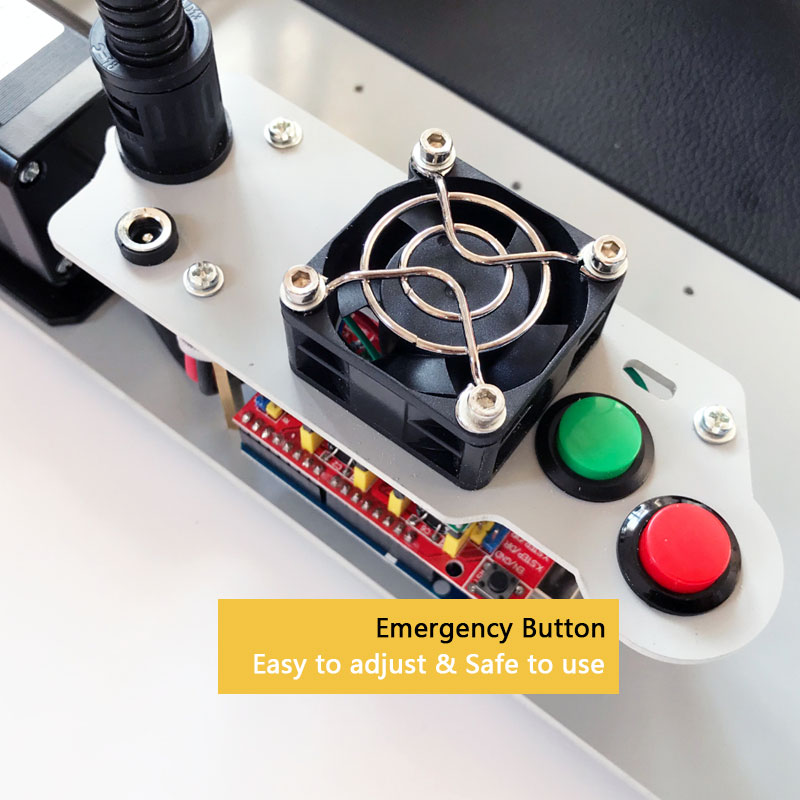
How to Adjust Limit Screw?
You can adjust the position of the limit screw by loosening the limit screw. When the screws reach your desired position, tighten them again. A screw wrench is included in the machine accessory kit.


