The electrode output is millivolt, and the relationship with pH value is as follows (25 ℃):
Be careful:
Please use external switching power supply to make the voltage close to + 5.00V as much as possible. The more accurate the voltage is, the higher the accuracy is!
Before each continuous use, the electrode needs to be calibrated with standard buffer solution. In order to get more correct results, the best ambient temperature is about 25 ℃, the known pH value should be reliable, and the closer its pH value is to the measured value, the better. If the sample you measured is acidic, please use ph4.00 buffer solution to calibrate the electrode. If the sample you measured is alkaline, please use ph9.18 buffer solution to calibrate the electrode. Calibration is carried out in sections only for better accuracy.
For each solution with different pH, the pH electrode needs to be cleaned with clean water. It is recommended to use deionized water for cleaning.
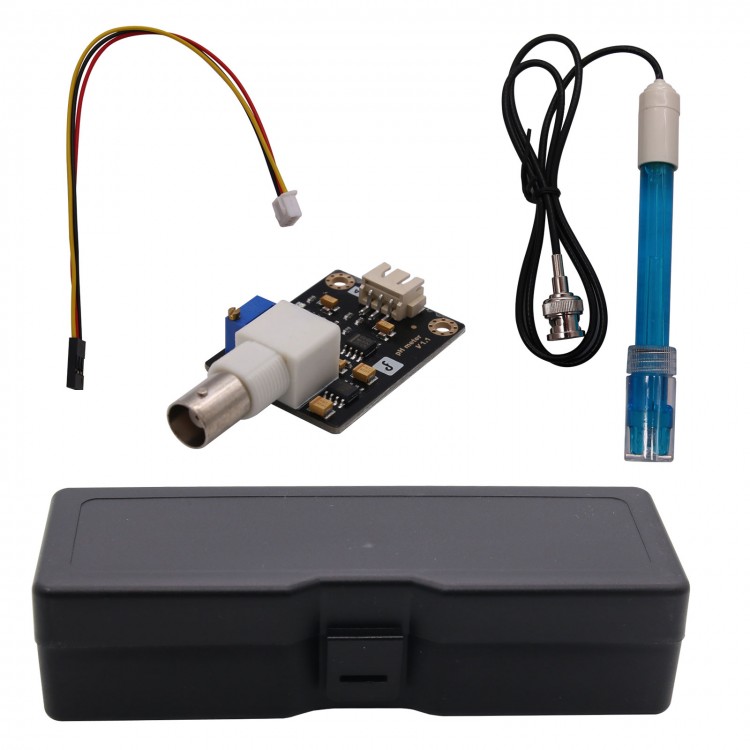
(1) connect each device as shown in the figure, that is, connect the pH electrode to the BNC interface of the pH meter circuit board, and then connect the pH meter circuit board to the analog port 0 of the Arduino master controller with the analog connection line. After power supply to Arduino master controller, you can see that the blue indicator light of pH meter circuit board is on.
(2) burn sample code to Arduino master controller.
(3) insert the pH electrode into the standard solution with a pH value of 7.00, or directly short-circuit the two inputs of BNC interface, open the serial port monitor of Arduino IDE, and you can see the current printed pH value, and the error will not exceed 0.3. Record the value printed at this time, and then change the difference value to offset in the program compared with 7.00. For example, if the printed pH value is 6.88, the difference value is 0.12, then change the "define offset 0.00" to "define offset 0.12" in the sample program.
(4) insert the pH electrode into the calibration solution with pH value of 4.00, wait for one minute, adjust the gain potentiometer, and make the printed pH value as stable as possible at about 4.00. At this point, the calibration of the acid section has been completed, and you can test the pH value of the acid solution.
Note: when measuring other solutions, the electrode must be cleaned.
(5) depending on the linear characteristics of the pH electrode itself, the pH value of the alkaline solution can be measured directly after the above calibration, but if you want to obtain better accuracy, it is recommended to recalibrate. The standard solution with pH value of 9.18 is used for alkaline section calibration, and the gain potentiometer is also adjusted to make it stable at about 9.18. After calibration, you can measure the pH value of the alkaline solution.
Sample code
After downloading the sample code, open the serial port monitor of Arduino ide to see the result.
 Black 3D-Printed Mini ESP32 Marauder Development Board Positioning Module with 1.44-inch Screen
$33.36
Black 3D-Printed Mini ESP32 Marauder Development Board Positioning Module with 1.44-inch Screen
$33.36
 White 3D-Printed Mini ESP32 Marauder Development Board Positioning Module with 1.44-inch Screen
$33.36
White 3D-Printed Mini ESP32 Marauder Development Board Positioning Module with 1.44-inch Screen
$33.36
 MPSoC XCZU19EG-F V0.3 AMR+FPGA Development Board Kit QSFP28 10Gbps Ethernet PCIE3.0 Support for Windows/Linux Systems
$1,537.98
MPSoC XCZU19EG-F V0.3 AMR+FPGA Development Board Kit QSFP28 10Gbps Ethernet PCIE3.0 Support for Windows/Linux Systems
$1,537.98