| Quantity | 3+ units | 10+ units | 30+ units | 50+ units | More |
|---|---|---|---|---|---|
| Price /Unit | $83.30 | $81.60 | $79.05 | $75.65 | Contact US |
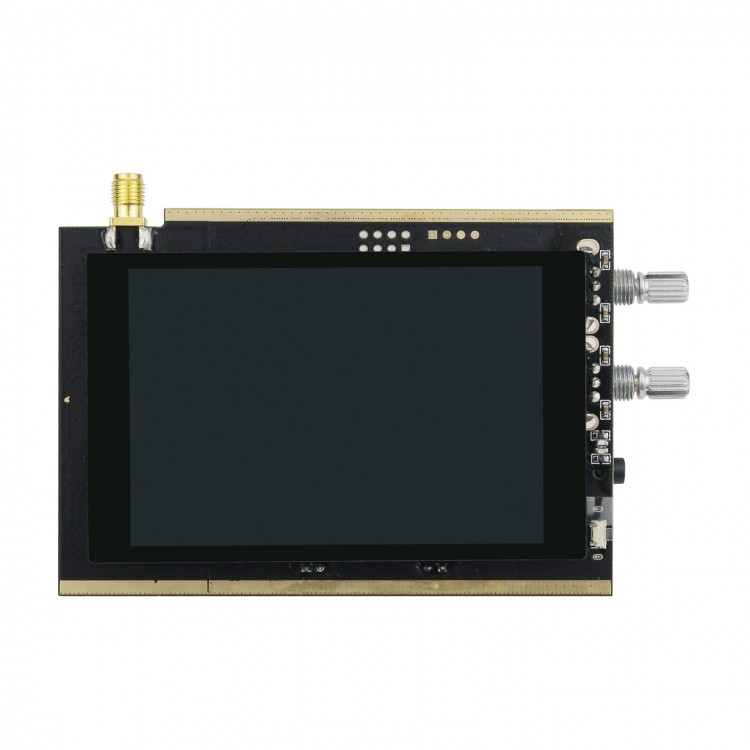
Malachite SDR Receiver Board Hola-SDR DSP Full Mode 50K-200MHz 400-2000MHz 3.5" IPS Touch Screen
Product Parameters:
1) The radio is constructed based on the SDR principle: the function is determined by the loaded software
2) Frequency range: from 50kHz to 200MHz and 400MHz to 2GHz
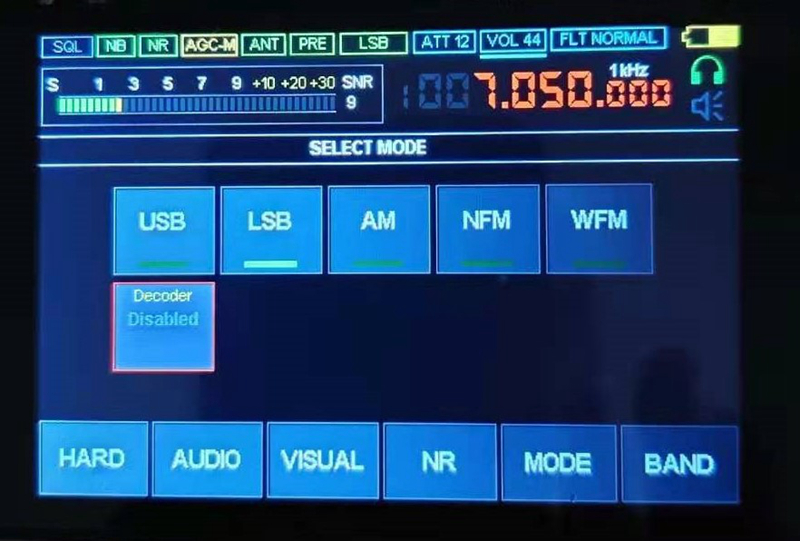
3) All types of analog modulation: AM, SSB, NFM, WFM
4) Powerful functions: variable filter width, adaptive noise suppressor, threshold noise suppressor, Noise Blanker, AGC, equalizer
5) Use the cheap but fully functional chip msi001
6) Powerful stm32h743 with a clock frequency of 480 MHz is applied
7) 3.5-inch IPS display with touch screen
8) There is a built-in UHF
9) Controls: 2 encoders with buttons and touch screen
10)Power supply: Supplied by an external TYPE-C (for Huawei mobile phone) interface
11) Consumption: 300mA when listening to headphones
12) Receiver on the built-in telescope or external antenna improves the HF receiving on the telescope antenna, an additional board with a source follower has been developed. The board will be built into the standard receiver design
13) Connect to your computer via USB, you can transmit CAT, IQ and audio
14) 160 kHz span, with scalability
15) Sensitivity: Under the condition of up to 250MHz, s/w is 0.3μV = 10dB; the limit receiving sensitivity is almost close to -130dbm
16) DSP filter adjustment range: 0-10KHz (adjusted to 50Hz-3KHz voice clarity and anti-interference ability are preferred)
17) Due to the characteristics of the msi001 chip used, the dynamic blocking range is about 85dB.
18) With backlight control
19) SMA female antenna socket
20) The main board size is 100x70mm (excluding the sizes of connectors)
21) Mainboard weight 78g
Package Included:
- 1 x SDR Receiver Board
Note:
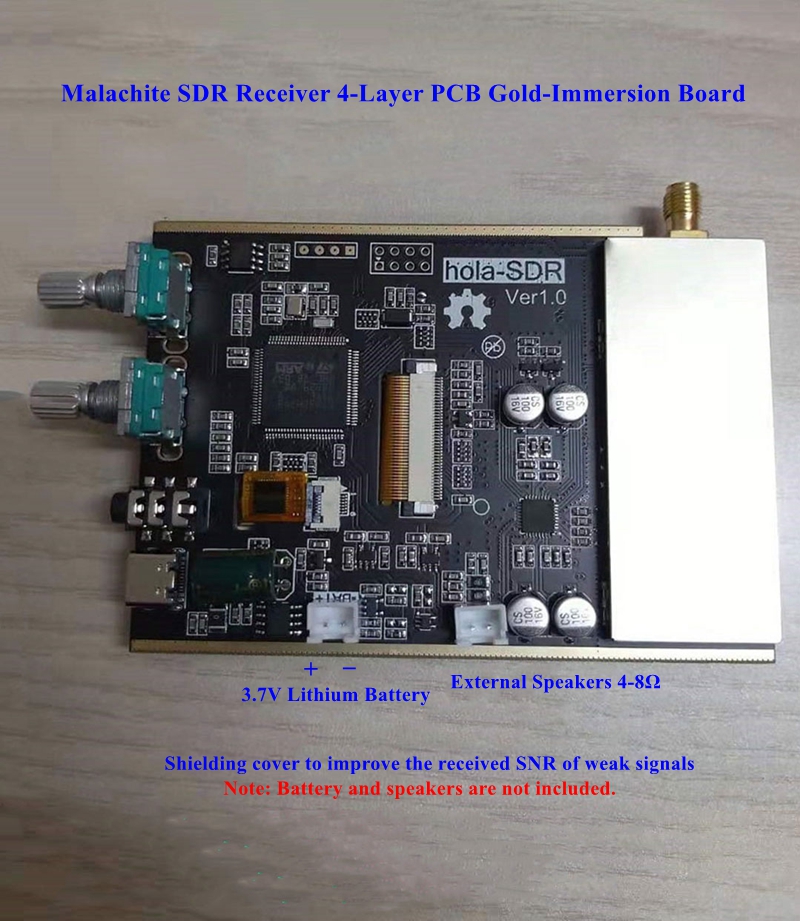
- Battery is not included. It can also be powered by a battery with capacity not less than 1500mAh, and charged via TYPE-C.
- Only the mainboard is included. Power supply, antenna, battery and speakers are not included.
- The motherboard can be powered by a mobile phone TYPE-C charger for Huawei, and can be equipped with a long wire as an antenna for easy listening.

Easy Operations:
1. Power on: Press and hold Switch for 2 seconds to power on. Shutdown: Press and hold the Switch for 2 seconds to shut down.
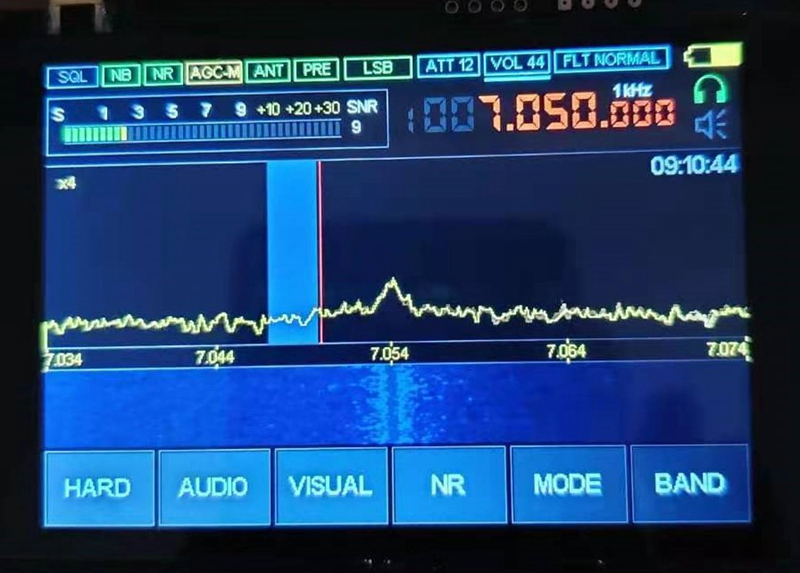
2. The knob in the upper right corner is used to adjust volume and DSP bandwidth. Click this button to switch between volume adjustment and DSP bandwidth adjustment.
3. The second knob in the upper right corner is frequency adjustment. When the underline at the bottom of the frequency is at a digit, turn this knob to adjust the frequency value of that digit. Tap the position of the frequency value with your finger to adjust the position of the underline to adjust the frequency you want. If the screen is blank, press the knob to light up the screen. Tap the knob to switch between headphones and speakers.
4. Receiving Mode Conversion: Long press the upper right knob for 3 seconds and then release it. There will be 5 receiving modes in the middle of the screen. Use your finger to switch between USB, LSB, AM, NFM, WFM. If you don't want to switch, you can click the knob in the upper right corner again to exit.
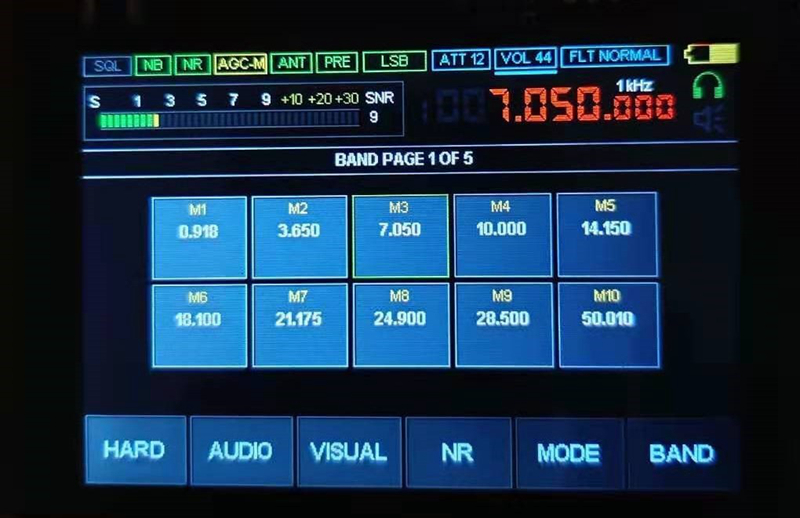
5. Click BAND in the lower right corner of the screen, the internal frequency used before the last shutdown will appear, and you can directly call it by tapping with your finger. If it is the registered version, you can press and hold the frequency box, you can hear a beep and store it, but the non-registered version has no storage function. Click BAND in the lower right corner of the screen to switch between 3 and storage pages. Click the knob in the upper right corner to exit.
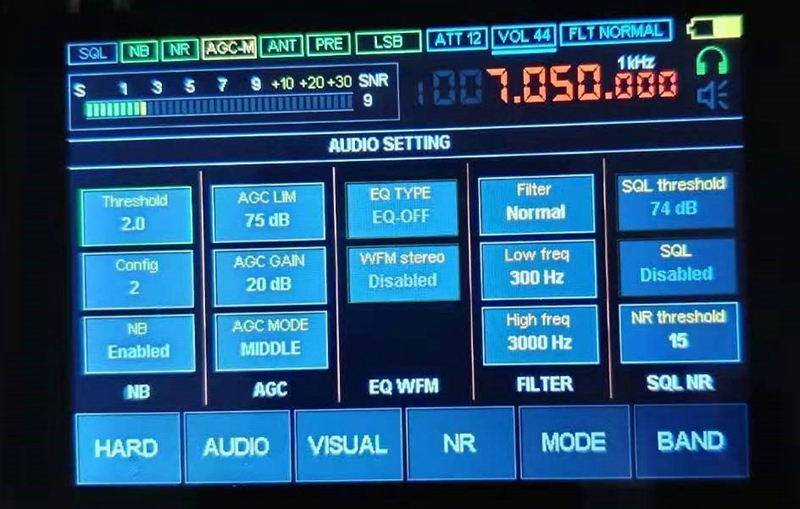
6. Internal Settings: Click MENU in the lower left corner of the screen, click HARD to enter. EN1 Reverse and EN2 Reverse refer to whether the clockwise adjustment of the two knobs in the upper right corner increases or the counterclockwise adjustment increases, which can not be saved for non-registered version. Those will be reset after shutting down, so there is no need to adjust. ANT option does not need to be adjusted, the internal default is the input signal of ANT terminal. When PRE is receiving shortwave frequency band, it is recommended to adjust it to OFF to make its internal filter work, improve the anti-interference ability, and enhance the received signal of shortwave frequency. After the adjustment is completed, click on the second one in the upper right corner and choose to exit. Adjust sound AUDIO according to your own preferences, RF GAIN can be adjusted according to received signal strength, which is not very obvious for the non-registered version.
6.1. HARD (setting): EN1, EN2: Increase or decrease when two encoders are reversely rotated. V bat/power display: S standard, L low voltage. SW ante/short wave antenna selection: 50 ohm/Hi-z high impedance. ATT attenuator: Same as transceiver. LNA/MIX, MIX GR: Do not turn on the functions that the current machine (including the original version) does not have, otherwise the gain and sensitivity will be greatly reduced! RF GAIN/RF gain: The same as the transceiver, when it is set to about 20, the sensitivity is the best. PREAMP/preamplifier: Same as transceiver. F correct/frequency correction: Use as needed. Sm correct/S meter correction: use as needed. Time setting: Long press HARD to enter time setting, then press Volume encoder to increase or decrease the number, and press inward to switch. When finished, press and hold the encoder, and release it when the beep sounds.
6.2. AUDIO: NB/electric spark noise, Thes/start control value and Config/setting value: these two items have been set to 2, you can try it. NB/Switch: Dis on/Ena off. AGC/automatic gain control. AGC LIN/AGC peak value: Experimental adjustment. MANUAL/manual control: experimental adjustment. AGC MODE/AGC mode: OFF, fast, normal, slow, very slow. EQ (Equalizer) EQ TYPE/Equalizer switch and selection: Click first, then use the Volume encoder to open and select; including light music, live, club, rock, bass, jazz, pop, language. WFM Stereo/FM Stereo: Only earphones. NR/DSP noise reduction Thes/setting value: Set according to hearing sense. SQL Thes/setting value. SQL switch.
6.3. VISUAL (screen effect) BRIGHT MIN/minimum brightness: 20. BRIGHT MAX/Maximum brightness: 100. REDUCT TIME/reduction time: 0 sec/0 seconds. SLEEP TIME/sleep time: 300 sec/sec. LCD SLEEP/backlight sleep switch: D/on, E/off. FFT ave/spectrum average speed: 50. FFT scale/spectrum display range: 50. FFT color/spectrum color: four kinds. Pan percent/frequency spectrum shift%: 70. WTF delay/spectrum reflection delay: 0. WTF Gain/spectrum reflect gain: 0dB. FFT fill/spectrum fill: D/on, E/off.
6.4. MODE (mode) is the same as the transceiver, and its decoder is a CW decoding switch. After opening, there is a small white bar below the frequency. After turning it on, Min SNR/minimum level appears: Adjust as needed to make the decoding more accurate.
6.5. BAND (Band) Band key, you can switch between bands and memory selection. The memory is divided into 5 pages, 10 per page; it can be stored in a certain memory arbitrarily. Ready to call. When storing, first adjust the frequency, mode, step, AGC, RF Gain, FLT parameters, PRE and other data, then select the memory page and location, press and hold the memory frame with your finger, and release it after hearing the beep.
6.6. Select frequency step: Press Frequency knob to switch to step mode, and then use the frequency knob to adjust as needed. The minimum step is 10Hz and the maximum is 30KHz..