| Quantity | 3+ units | 10+ units | 30+ units | 50+ units | More |
|---|---|---|---|---|---|
| Price /Unit | $7.86 | $7.70 | $7.46 | $7.14 | Contact US |
 PT-90D Wood Moisture Meter Wood Moisture Tester with 5-40% Range and Rechargeable Battery Kit
$24.15
PT-90D Wood Moisture Meter Wood Moisture Tester with 5-40% Range and Rechargeable Battery Kit
$24.15
 PT-90D Wood Moisture Meter Wood Moisture Tester with 5-40% Range and LED Display (without Battery)
$20.31
PT-90D Wood Moisture Meter Wood Moisture Tester with 5-40% Range and LED Display (without Battery)
$20.31
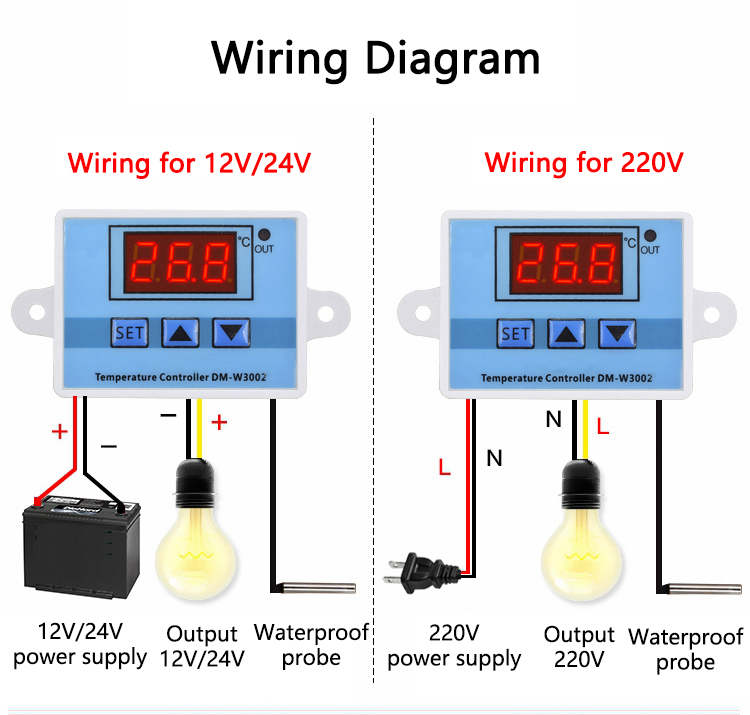
 W3002 AC110V-220V Isolated Temperature Controller Microcomputer Controller for Heating Cooling
$8.25
W3002 AC110V-220V Isolated Temperature Controller Microcomputer Controller for Heating Cooling
$8.25
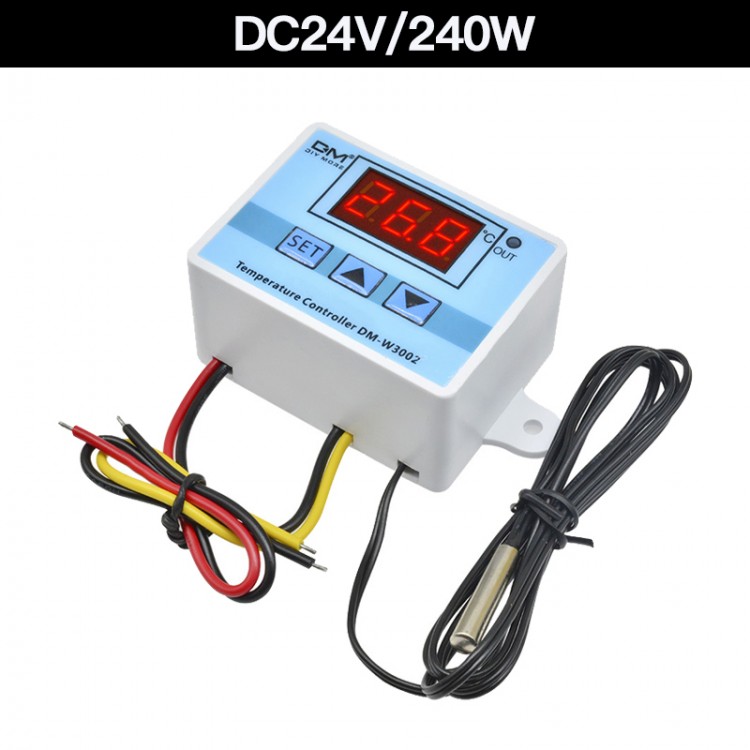
W3002 DC 24V 240W Digital Temperature Controller Microcomputer Controller Supports Heating Cooling
Specifications:
- Product Model: W3002
- Item name: Microcomputer temperature controller
- Temperature measurement range: -50 to 110℃
- Temperature control range: -50 to 110℃
- Temperature measurement accuracy: ±0.2℃
- Temperature control accuracy: ±0.1℃
- Measurement input: NTC10K 1m/3.3ft waterproof probe
- Input power supply: DC 24V
- Output power: 240W
- Output type: direct output
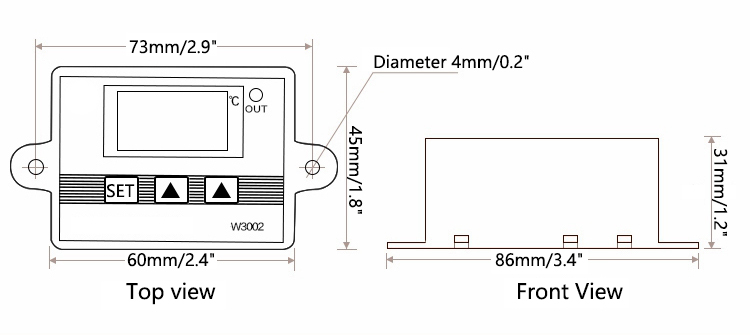
- Hole spacing: 73mm/2.9" (hole diameter 4mm/0.2")
Application:
- Applied to various cabinets
- Control incubation temperature
- Control refrigerator temperature
- Control boiler pumps
Attention:
- Please make sure that the supported power of the thermostat you buy is greater than the power of the device you need to control, otherwise the thermostat will easily burn out. Pump motor products are recommended to be used with AC contactors, please contact customer service for details.
Package Included:
- 1 x Temperature Control with Probe (DC 24V 240W)
Note:
- Other items pictured are not included, for demonstration purposes only. Thank you for your understanding!
Settable Parameters:
* P0: Start Temperature (Range -50 to 110℃. Default 25℃)
* P1: Stop Temperature (Range -50 to 110℃. Default 40℃)
* P2: Temperature Calibration (Range -10 to 10℃. Default 0℃)
* P3: Delay Start (Range 0-10 minutes. Default 0 minutes)
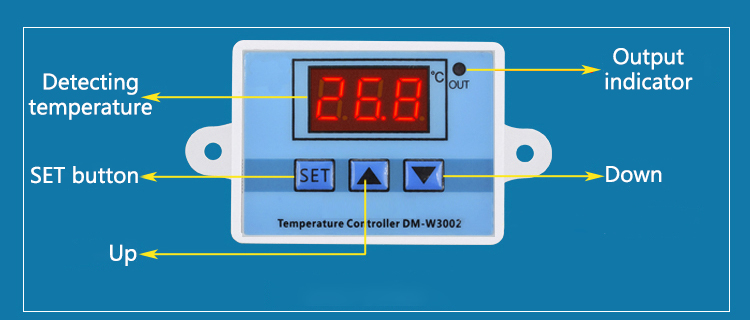
Code and Function Introduction:
* P0: Set Start Temperature. Press the SET button to enter the internal menu. The default display is for P0, and then click the SET button, use up and down buttons to set the starting temperature.
* P1: Set Stop Temperature. Press the SET button to enter the internal menu. The default display is for P0. Use up and down button to change to P1, and then press the SET button again, use up and down buttons to set the stop temperature.
* P2: Set Temperature Calibration. Press the SET button to enter the internal menu. Use up and down buttons to change to P2, press the SET button again, use the up and down button to do the calibration. (Attention: In the settings, if the detected temperature value is 0.5°C higher than the actual temperature, the calibration temperature to be set is -0.5°C. If the detected value is 1°C lower than the actual temperature value, the calibration temperature to be set is 1°C. Detected temperature + corrected temperature = actual temperature.)
* P3: Set Delay Start. Press the SET button to enter the internal menu. Switch to P3 by pressing the up and down buttons. Press the SET button again, and set the required delay time by pressing the up and down buttons, and the unit is minutes. (Attention: Delay start is generally used for compressor refrigeration. If it is used for refrigerator freezers, this value needs to be set. According to the compressor return pressure, the general setting value is 3-6 minutes. If you are not using it for control or don't need the delay function, you can skip it.
FAQ:
1. How to restore factory settings?
It is powered on, press and hold the up and down buttons at the same time for about 3 seconds, after the digital tube displays 888, it will automatically jump to the detection temperature, that is, the factory settings are restored successfully.
2. Its digital tube displays LLL.
It means that the sensor is open, check the sensor, or replace the sensor.
3. It displays HHH.
It means that the sensor is short-circuited.