| Quantity | 3+ units | 10+ units | 30+ units | 50+ units | More |
|---|---|---|---|---|---|
| Price /Unit | $43.02 | $42.14 | $40.83 | $39.07 | Contact US |
 A6 SE APM Opensource UAV Flight Control with Galvanometer Module and Note3 Ultra GPS for Pixhawk UAV Drones
$234.83
A6 SE APM Opensource UAV Flight Control with Galvanometer Module and Note3 Ultra GPS for Pixhawk UAV Drones
$234.83
 CUAV NEO 4SE High Precision Navigation Opensource GPS Positioning Module for U-blox M10 Satellite Receiving
$73.67
CUAV NEO 4SE High Precision Navigation Opensource GPS Positioning Module for U-blox M10 Satellite Receiving
$73.67
 CUAV New Pixhawk V6X Intelligent Opensource Flight Controller with NEO 3 GPS Module (45cm Cable) for Multi-rotor Drones
$290.93
CUAV New Pixhawk V6X Intelligent Opensource Flight Controller with NEO 3 GPS Module (45cm Cable) for Multi-rotor Drones
$290.93
Ublox NEO-6M GPS+ HMC5883L Compass Module APM 2.6 ARDUPILOT MEGA 2.6 +Shell Case
Description:
- Ublox NEO-6M GPS+ HMC5883L Compass module APM 2.6 ARDUPILOT MEGA 2.6 +Shell
- The 3DR uBlox GPS + Compass module currently works with APM:Plane, APM:Rover and the APM:Copter version 3.0.1 (it does not work with the current APM:Copter 2.9.1b and earlier).
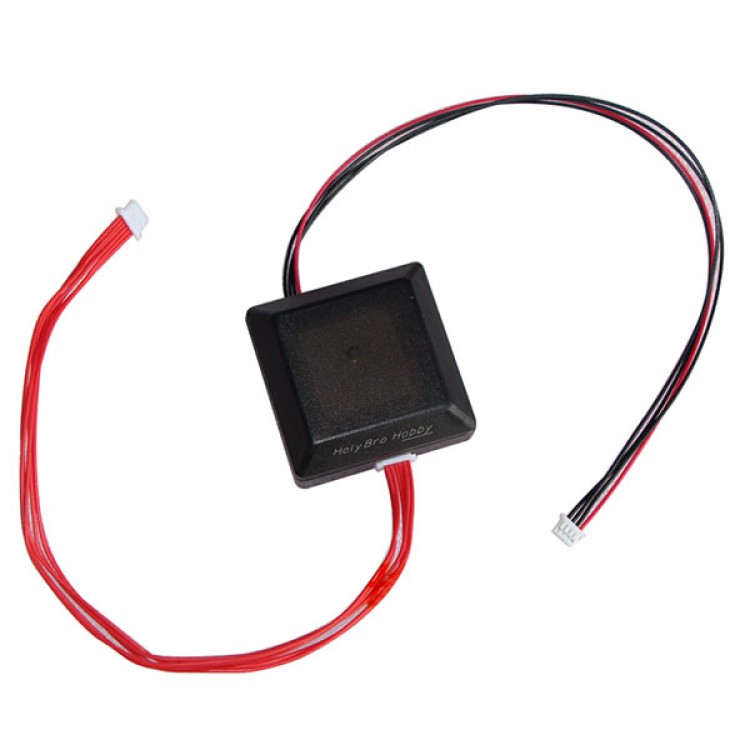
Connecting to APM 2.6
3DR uBlox GPS with Onboard Compass is compatible with APM 2.6 and includes two cables: one 4-position cable and one 5-position-to-6-position cable. To connect the GPS module to APM 2.6, connect the GPS port to the APM GPS port using the 5-position-to-6-position cable (use the top-entry port, not the side-entry port), and connect the GPS MAG port to the APM I2C port using the 4-position cable.
Mounting the GPS Module
This module permits the GPS to be mounted separately from the flight control module so that it can have the best clear (view) of the sky and allows the compass to be distanced from interfering magnetic fields. When mounting the GPS+Compass module:
- Place the module on the outside of your vehicle (in an elevated position if appropriate) with a clear view of the sky, as far as possible from the motors and ESCs, with the arrow facing forward.
- Distance the module from DC power wiring and the batteries by at least several inches.
- Place the module clear of nearby iron containing metallic objects. (Use nylon or non magnetic stainless steel hardware and nylon or aluminum standoffs to mount the module).
- Twist power and ground wires where possible.
Setup in Mission Planner
Note:If the GPS / Magnetometer board is mounted in its correct direction (arrow pointing forward) and the Flight controller board is also mounted right side up with its arrow pointing forward, the (COMPASS_ORIENT) parameter will need to be set to (Roll 180) or “8″ because the compass is upside down under the GPS modules antenna.
- Start Mission Planner and connect your flight control board: APM or PX4 and select the “Connect” tab.
- Select the “Hardware” tab, then select the left menu “Mandatory Hardware” tab and then select the “Compass” tab.
- Select the down arrow in the compass orientation pull down item and select “ROTATION_ROLL_180″.
Note:If the Flight controller board is put in an alternate orientation, the Orientation (i.e. COMPASS_ORIENT parameter) should be set according to the gps’s attitude to the flight controller. So for example if both the Flight controller and the GPS+compass module were mounted on the bottom of the vehicle (a ridiculous example) then you would leave the Compass orientation as ROTATION_ROLL_180. If however you wanted to mount the GPS+Compass right-side-up you would pick Orientation “ROTATION_NONE” because the original rotation was Roll 180, then you add the compass rotation which is another roll 180 = Roll 360 = no rotation.
Package Included:
- GPS+Compass module
- 6P-6P cable for GPS
- 4P-4P cable for compass
- GPS protective shell