| Quantity | 3+ units | 10+ units | 30+ units | 50+ units | More |
|---|---|---|---|---|---|
| Price /Unit | $189.04 | $185.18 | $179.40 | $171.68 | Contact US |
 SKYDROID C20 23X Optical Zoom PTZ 3-Axis Night Vision 2K FPV Gimbal Camera 1080P F1.6-3.5 Aperture
$490.28
SKYDROID C20 23X Optical Zoom PTZ 3-Axis Night Vision 2K FPV Gimbal Camera 1080P F1.6-3.5 Aperture
$490.28
 SKYDROID C12 Thermal Imaging 2K HD Digital PTZ 3-Axis Stable Dual Light FPV Gimbal Camera for FPV Racing Drones
$447.94
SKYDROID C12 Thermal Imaging 2K HD Digital PTZ 3-Axis Stable Dual Light FPV Gimbal Camera for FPV Racing Drones
$447.94
 Hawk Eye 4-Channel Receiving FPV Monitor Distribution Display HDMI-compatible TV Dual Output 5.8G for Racing Drones
$183.48
Hawk Eye 4-Channel Receiving FPV Monitor Distribution Display HDMI-compatible TV Dual Output 5.8G for Racing Drones
$183.48
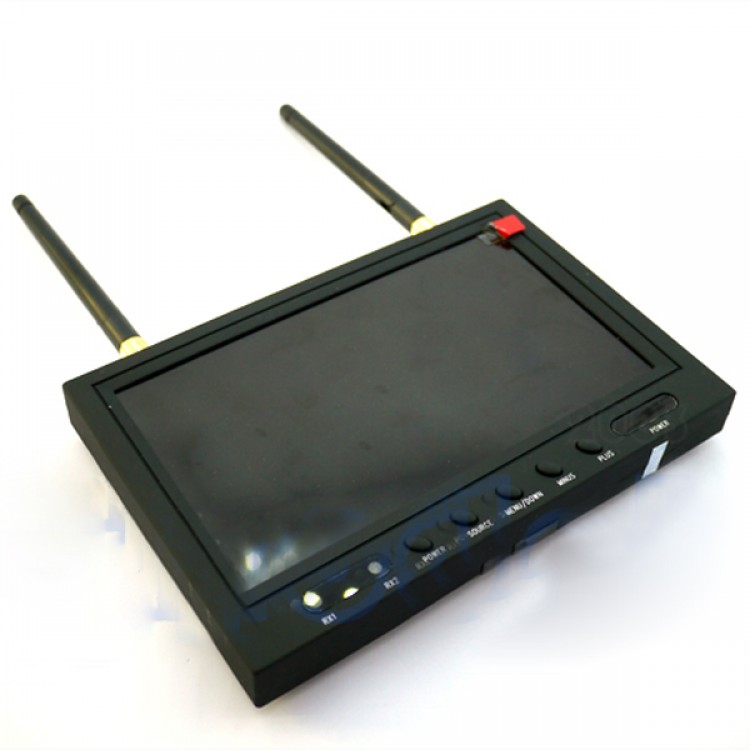
5.8GHz Wireless FPV 7"TFT LCD Diversity Receiver Monitor w Sunhood Antenna 800x400 for Photography
Specification:
- 1. Screen size:7”
- 2. Screen type: TFT LCD Screen/long life, LED backlight
- 3. Resolution: 800*480
- 4. Brightness: 450cd/m2
- 5. Contrast: 500:1
- 6. View Angle: 140/120degree (Horizontal/Vertical)
- 7. Working Voltage: DV 7-12V(center positive) or 11.1V Li-battery
- 8. Power Consumption: < 8w
- 9. Size: 180mm x 120mm x 23mm
- 10. Built-in 5.8Ghz Dual diversity receiver automatically for best reception
-11. Built-in 2CH 5.8Ghz AV output and 1CH AV input
- 12. Support 9 languages menu selection
-13. Working temperature: -10℃~+ 65 ℃
Features:
- 1. Built-in Dual Receiver Automatically for best reception Automatic Antenna Switching
- 2. Dual buffered AV outputs
- 3. Can receive 2 different channels at the same time
- 4. Not affect by 2.4GHz R/C Radios
- 5. AV Receiver with Diversity inputs
- 6. Small, light weight, durable
Working frequencies
· CH1: 5705MHz
· CH2: 5685MHz
· CH3: 5665MHz
· CH4: 5645MHz
· CH5: 5885MHz
· CH6: 5905MHz
· CH7: 5925MHz
· CH8: 5945MHz
Package Included:
- LCD Recevier * 1
- Antennas * 2
- AV Cables * 1
- Power Cable *1
- Sunshade*1
1. Screw the antennas and then power the LCD screen. Power LED is on and RX1 and RX2 are flashing alternately. RF1 is to RX1 and RF2 is to RX2, better signal first.(See Figure1). RF1 and RF2 must be in the same Channel.
2. Plug AV cable to RF1 AVOUT and connect the other end to the Monitor, then you can see the signals from RF1. So does the RF2 AVOUT. RF1 and RF2 must be in different channels to avoid signal interference. (see Figure2)
3. Plug AV cable to any of the two AV IN ports, LCD will switch to the AV in Automatically.
4. Buttons (See Figure1)
- POWER: LCD power on/off button.
-SOURCE: Selection for AV1 and AV2
- MENU/DOWN: Setup-Brightness, Contrast, Color, Language, Image Rotation, Options-zoom 16:9/4:3, Auto turn off (5s/10s/OFF), Rest
- MINUS: Down
- PLUS: Up