| Quantity | 3+ units | 10+ units | 30+ units | 50+ units | More |
|---|---|---|---|---|---|
| Price /Unit | $19.44 | $19.05 | $18.45 | $17.66 | Contact US |
 HSCanT 8Mbps High Speed USB to 4-Channel CAN FD Tool HPM5321 Support for SLCAN and GS USB Protocols
$47.82
HSCanT 8Mbps High Speed USB to 4-Channel CAN FD Tool HPM5321 Support for SLCAN and GS USB Protocols
$47.82
 PX Logic 32 32-Channel 1GHz 4G Storage USB3.0 Super High Speed Logic Analyzer with Accessory Kit
$220.81
PX Logic 32 32-Channel 1GHz 4G Storage USB3.0 Super High Speed Logic Analyzer with Accessory Kit
$220.81
 PX Logic 16 Pro 16-Channel 1GHz 4G Storage USB3.0 Super High Speed Logic Analyzer with Accessory Kit
$143.08
PX Logic 16 Pro 16-Channel 1GHz 4G Storage USB3.0 Super High Speed Logic Analyzer with Accessory Kit
$143.08
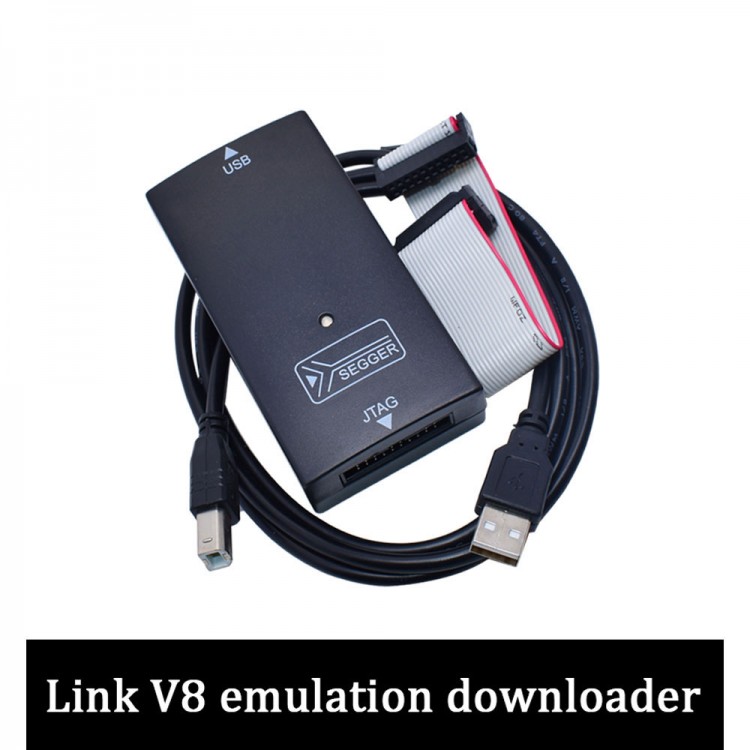
J-Link JLink V8 USB JTAG Emulator Downloader Debugger High Speed English Version for STM32 ARM
Product Description:
It is a JTAG emulator to support emulation of chips for ARM kernel. Cooperate with integrated development environment for IAR Ewarm, ADS, Keil, WinARM, and RealView, it supports for all ARM7/ARM9 core chip simulation, through the RDl interface and the integrated development environment seamless connection. It is easy to connect and to operate. It is also simple and easy to learn, thus it is a good practical development tool for learning and developing ARM.
Differences between V8 and V9:
1. Different speeds: V8 supports up to 10M (JTAG debug mode) /4M (SDW debug mode), while V9 supports up to 20M (JTAG debug g mode) /15M (SDW debug mode).
2. Different stability: V9's driving IC has voltage self--adaptive ability, which automatically ADAPTS to the CPU voltage of the target board under the condition of correct wiring. CPUs from 1.8 to 5.5V can be debugged, while the V8 version can only debug 3.3V CPUs, and debugging 5V CPUs is very unstable.
3. V8 may make your device fail to boot due to non-hardware problems, which is basically not the case with V9.
4. Some of the latest CPU V8 are no longer supported, while V9 supports almost all CPUs for ARM.
Specifications:
- Electromagnetic compatibility (EMC): EN 55022, EN 55024
- Operating temperature: +5°C to +60°C
- Storage temperature: -20°C to +65 °C
- Relative humidity (non-condensing): Max. 90%RH
Supported Operating Systems:
- For Microsoft Windows XP
- For Microsoft Windows XP x64
- For Microsoft Windows 2003
- For Microsoft Windows 2003 x64
- For Microsoft Windows Vista
- For Microsoft Windows Vista x64
- For Windows 7
- For Windows 7 x64
- For Windows 8
- For Windows 10
Product Features:
JLink for ARM Main Features:
- Seamless JTAG emulator for IAR Ewarm integrated development environment
- Supports for all ARM7/ARM9 core chips, as well as for Cortex M3, including Thumb m
- Support for ADS, IAR, KEIL, WINARM, REALVIEW, etc. Almost all of the development - Download speeds up to 600KB/s for ARM7, 550KB/s for ARM9, and up to 800KB/s
- High JTAG speed 12MHz
- Target board voltage range 1.2V to 3.3V, 5V compatible
- Automatic speed recognition function
- Monitor all JTAG signals and target board voltages
- Fully plug and play
- Use USB power (but not power to target board)
- With USB cable and 20-core flat cable
- Support serial connection of multiple JTAG devices
- Standard 20-core JTAG emulation plug
- Optional 14-cell JTAG emulation plug
- Optional adapter for 5V target board
- With Link TCP/IP Server, allowing it to be used over TCP/IP networks
Support for ARM Kernel:
- For ARM7TDMI (Rev.1)
- For ARM7TDMI (Rev.3)
- For ARM7TDMI-s (Rev 4)
- For ARM720T*ARM920T
- For ARM926EJ-S
- For ARM946E-S
- For ARM966E-s
- For ARM 11
- For Architecture (M3)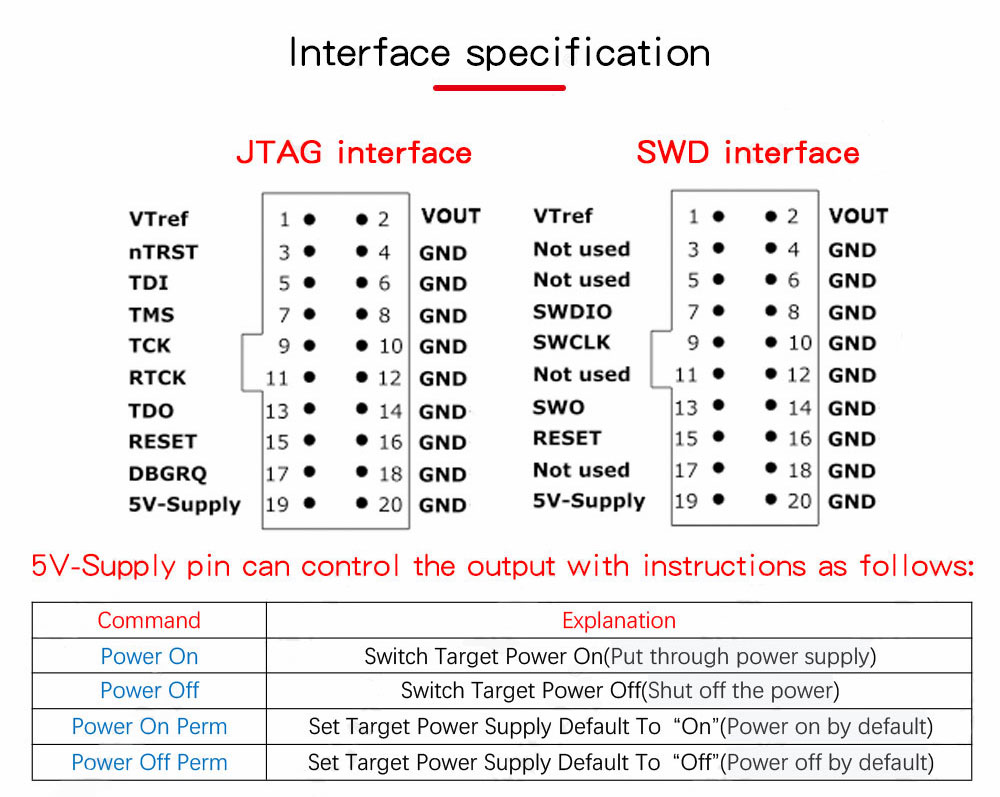
* VOUT is a 3.3V voltage output pin. The user can remove the short circuit cap inside the rear device and turnoff the 3.3V output.
* VTREF is the internal voltage reference and this pin must be connected to the VCC of the MCU.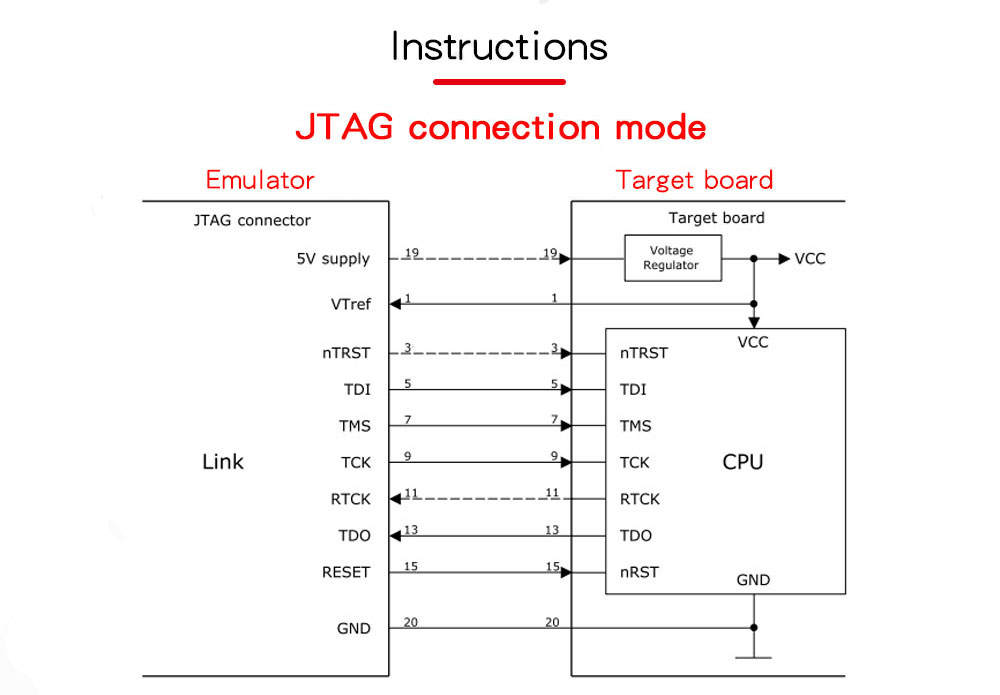
There are generally three kinds of power supplies:
1. Use 5V-Supply pin to power MCU through LDO of target board.
2. Connect VOUT pin directly to VCC of MCU for power supply.
3. Users can also choose the target board with power supply.
Note: Regardless of the power supply, the VTREF pin must be connected to the VCC of the MCU.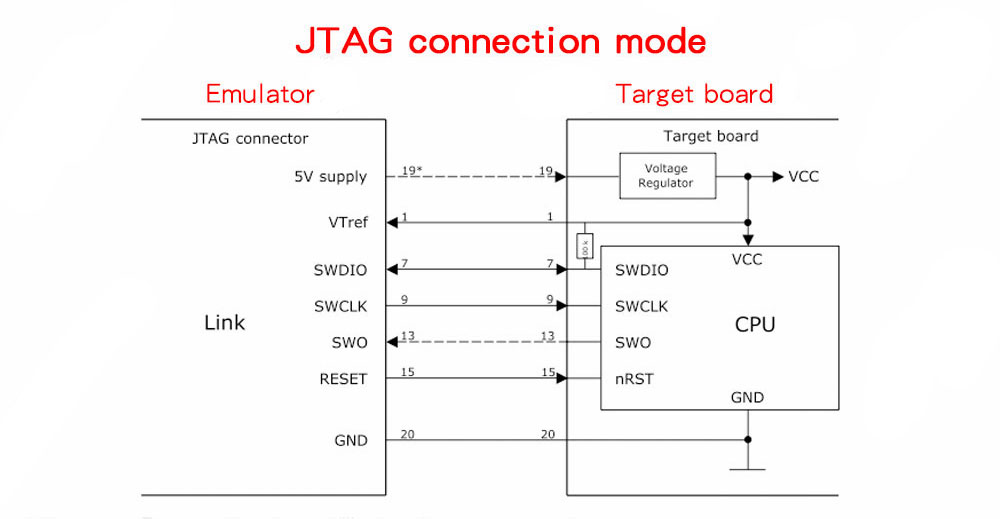
Package Included:
- 1 x Emulator
- 1 x USB Data Cable
- 1 x Ribbon Cable


 + Dupont Cables")


 + Dupont Cables")
 + OpenCTR Dedicated Cable")