| Quantity | 3+ units | 10+ units | 30+ units | 50+ units | More |
|---|---|---|---|---|---|
| Price /Unit | $25.54 | $25.02 | $24.24 | $23.19 | Contact US |
 A6 SE APM Opensource UAV Flight Control with Galvanometer Module and Note3 Ultra GPS for Pixhawk UAV Drones
$234.83
A6 SE APM Opensource UAV Flight Control with Galvanometer Module and Note3 Ultra GPS for Pixhawk UAV Drones
$234.83
 CUAV NEO 4SE High Precision Navigation Opensource GPS Positioning Module for U-blox M10 Satellite Receiving
$73.67
CUAV NEO 4SE High Precision Navigation Opensource GPS Positioning Module for U-blox M10 Satellite Receiving
$73.67
 CUAV New Pixhawk V6X Intelligent Opensource Flight Controller with NEO 3 GPS Module (45cm Cable) for Multi-rotor Drones
$290.93
CUAV New Pixhawk V6X Intelligent Opensource Flight Controller with NEO 3 GPS Module (45cm Cable) for Multi-rotor Drones
$290.93
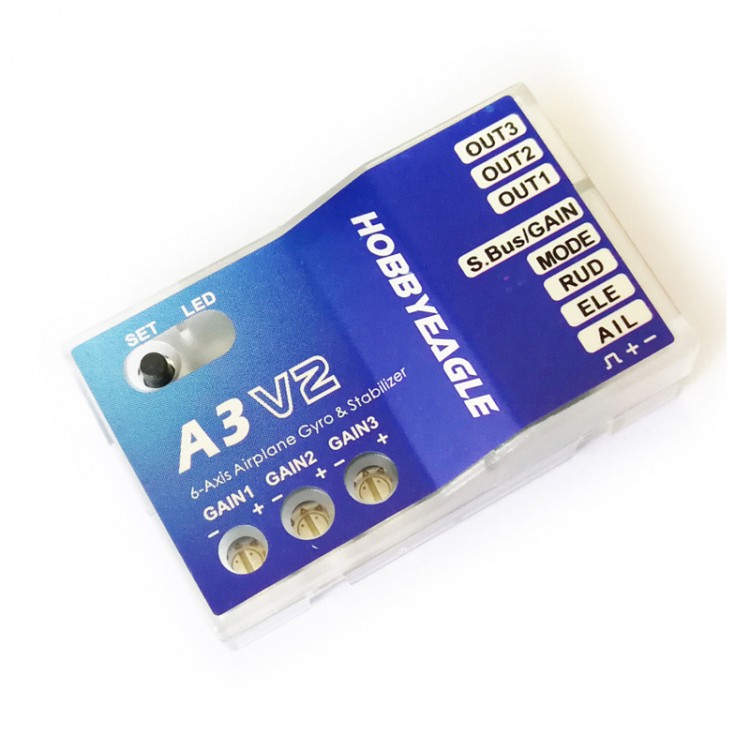
A3 V2 6-Axis Gyro Flight Stabilization Controller Hobby Eagle 2018 Version
Specifications:
- Item Name: A3 V2 flight controller
- Material: Metal
- Input Voltage: 5 to 7.4V
- Servo Travel: 1520 ± 500μs
- Gyroscope: ± 2000dps
- Accelerometer: ± 4g
- Operating Temp: -40 ℃ to 85 ℃
- Size: 43 × 27mm
- Weight: 11g
Features:
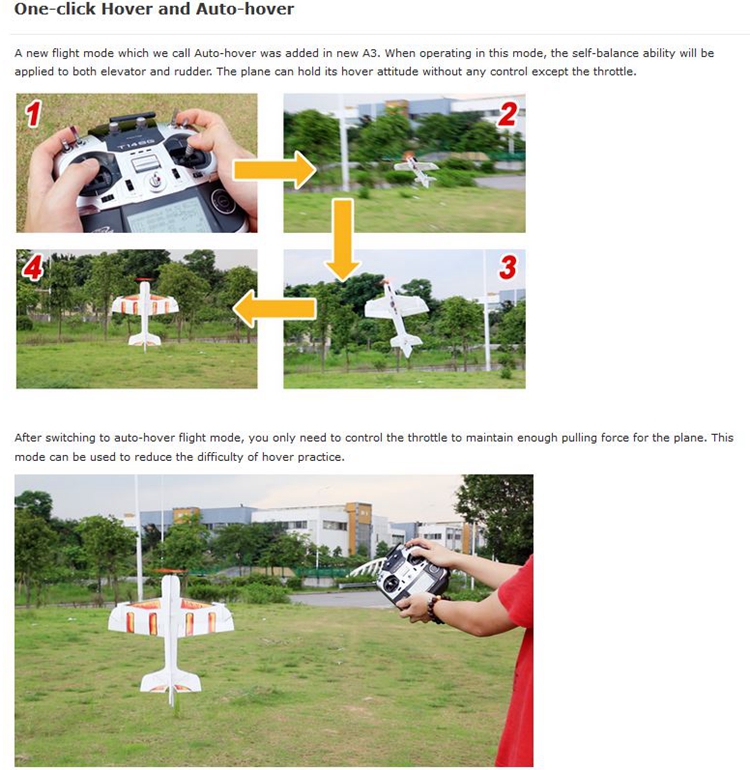
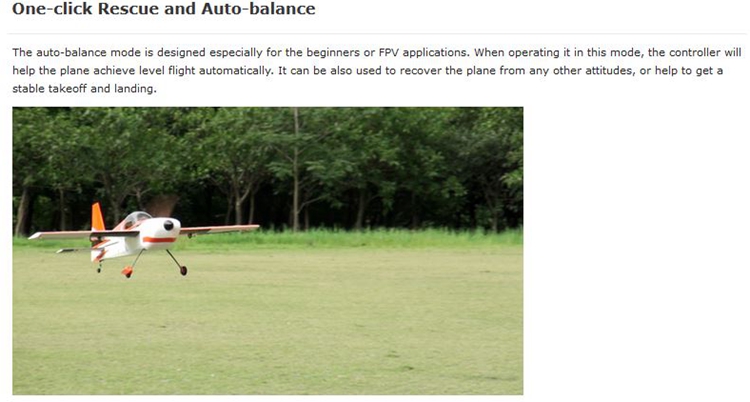
- One-click Auto Hover
- 4 Flight Modes: Normal, Auto-balance, Auto-hover and Gyro Off modes.
- 3 Wing Types: Standard, Delta-wing (Flying-wing) and V-tail.
- 3 Working Frequencies for Servos: 50Hz, 125Hz and 250Hz
- Separated gain adjustment for each flight mode.
- Automatic stick centering.
- Support HV (7.4) servos and receiver.
- Support for standard Futaba S.Bus / S.Bus 2.
- Easy to use, extremely well-suited to beginners
Note: The new firmware update V2.0 provides an advanced gyro gain drop algorithm for superior performance. The user manual V1.0 is still applicable to the new firmware.
Download User Manual Here:
http://www.hobbyeagle.com/manuals/NewA3_User_Manual_v1.0_en.pdf

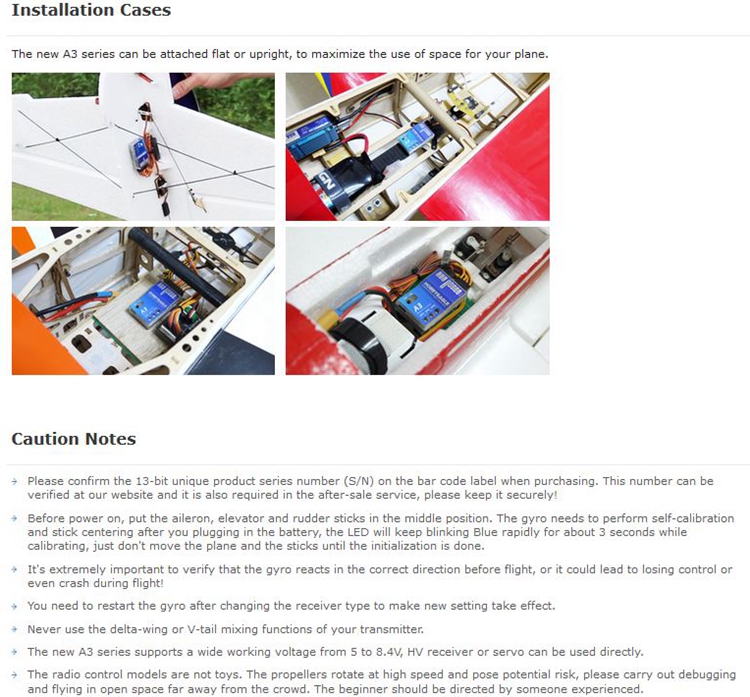
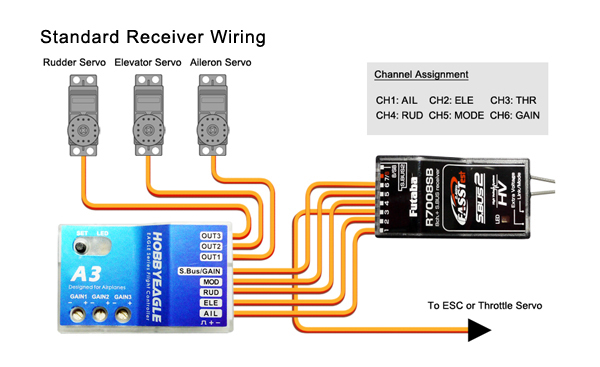
Connection:
The new A3 series provides 5-channel inputs and 3-channel outputs. You only need to connect the receiver and servos to the corresponding pins on the side of the gyro. The knobs are used to adjust the gain for each flight mode, clockwise for increase, anticlockwise for decrease. It supports for Futaba's S.Bus and S.Bus 2.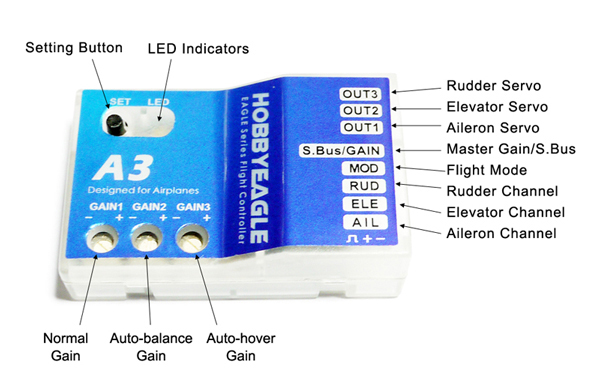

Setting Menu:
Press and hold down the button for more than 2 seconds (long press), release it when the LED starts to blink Blue&Red rapidly. In the setting menu, the LED should be blinking Blue&Red for N times in a loop with the sequence by the chart below. N stands for the number of the setting function.
Package Included: