| Quantity | 3+ units | 10+ units | 30+ units | 50+ units | More |
|---|---|---|---|---|---|
| Price /Unit | $19.40 | $19.01 | $18.41 | $17.62 | Contact US |
 LC29HBS Dual Band Multi-constellation Base Station GNSS Module + Antenna with RTK Function GPS/BDS/Galileo/QZSS/GLONASS
$45.10
LC29HBS Dual Band Multi-constellation Base Station GNSS Module + Antenna with RTK Function GPS/BDS/Galileo/QZSS/GLONASS
$45.10
 LC29HBS Dual Band Multi-constellation Base Station GNSS Module with RTK Function GPS/BDS/Galileo/QZSS/GLONASS
$33.44
LC29HBS Dual Band Multi-constellation Base Station GNSS Module with RTK Function GPS/BDS/Galileo/QZSS/GLONASS
$33.44
 LC29HDA Dual Band Multi-constellation Mobile Station GNSS Module + Antenna with RTK Function GPS/BDS/Galileo/QZSS/GLONASS
$49.96
LC29HDA Dual Band Multi-constellation Mobile Station GNSS Module + Antenna with RTK Function GPS/BDS/Galileo/QZSS/GLONASS
$49.96


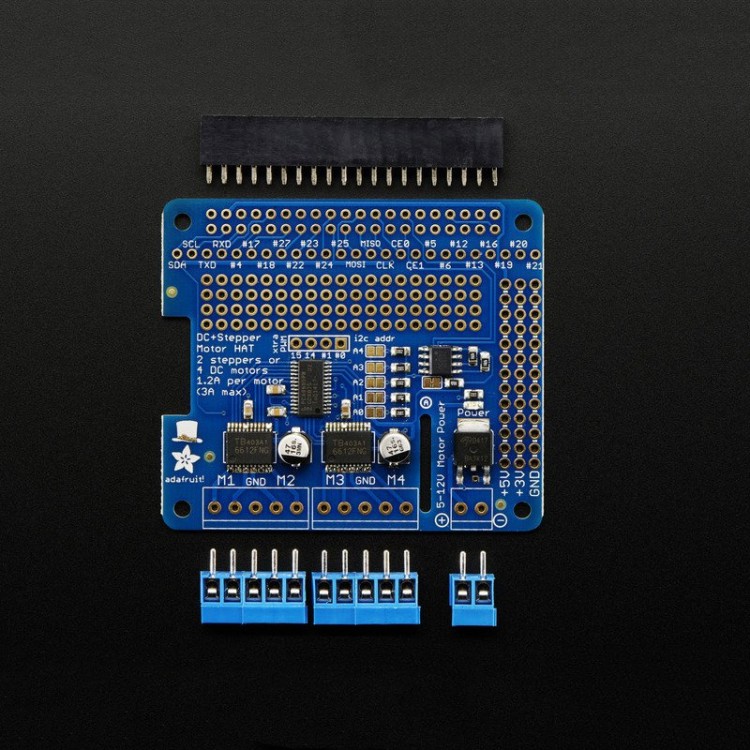
Let your robotic dreams come true with the new DC+Stepper Motor HAT from Adafruit. This Raspberry Pi add-on is perfect for any motion project as it can drive up to 4 DC or 2 Stepper motors with full PWM speed control.
Product Description:
- Since the Raspberry Pi does not have a lot of PWM pins, we use a fully-dedicated PWM driver chip onboard to both control motor direction and speed. This chip handles all the motor and speed controls over I2C. Only two GPIO pins (SDA & SCL) are required to drive the multiple motors, and since it's I2C you can also connect any other I2C devices or HATs to the same pins.
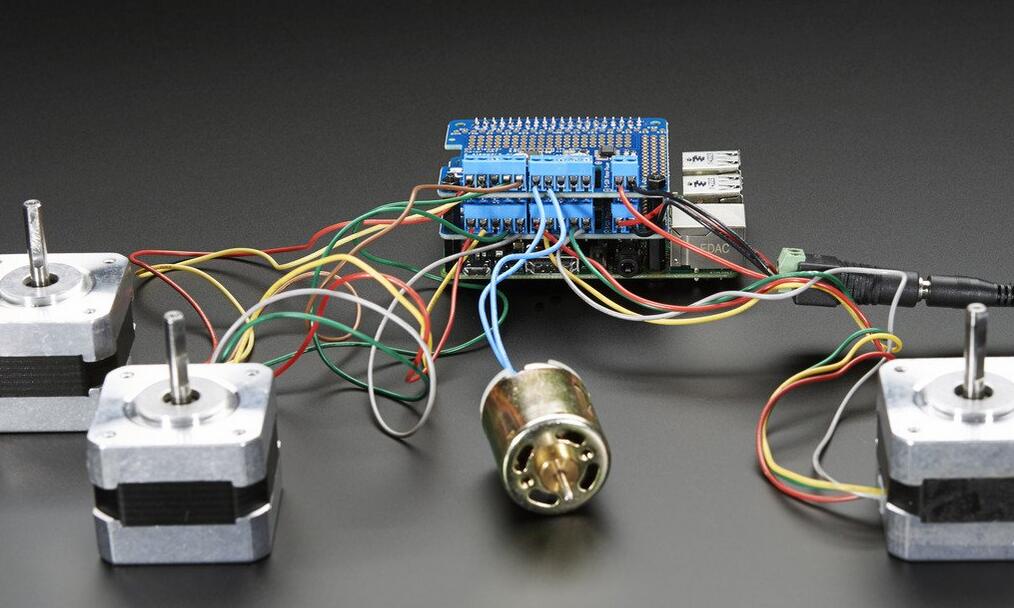
- In fact, you can even stack multiple Motor HATs, up to 32 of them, for controlling up to 64 stepper motors or 128 DC motors - just remember to purchase and solder in a stacking header instead of the one we include.
- If connecting the Hat off-the Pi via jumpers, you will need to connect GND and 3.3v in addition to SDA and SCL.
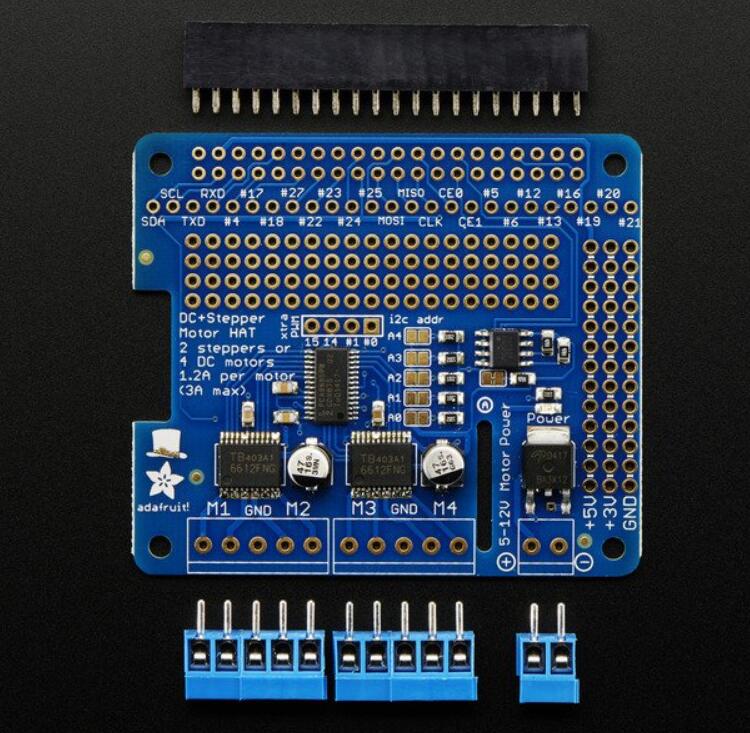
- Motors are controlled TB6612 MOSFET driver: with 1.2A per channel current capability (20ms long bursts of 3A peak), a big improvement over L293D drivers and there are built-in flyback diodes as well.
- We even had a little space so we added a polarity protection FET on the power pins and a bit of prototyping area. And the HAT is assembled and tested here at Adafruit so all you have to do is solder on the included 2x20 plain header and the terminal blocks.
Lets check out these specs again:
- 4 H-Bridges: TB6612 chipset provides 1.2A per bridge (3A brief peak) with thermal shutdown protection, internal kickback protection diodes. Can run motors on 4.5VDC to 13.5VDC.
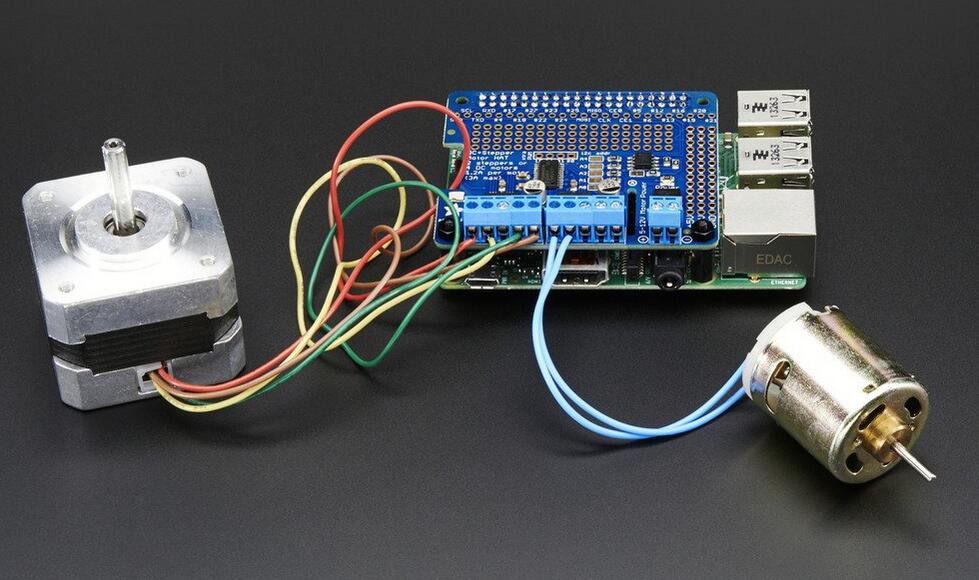
- Up to 4 bi-directional DC motors with individual 8-bit speed selection (so, about 0.5% resolution)
- Up to 2 stepper motors (unipolar or bipolar) with single coil, double coil, interleaved or micro-stepping.
- Big terminal block connectors to easily hook up wires (18-26AWG) and power
- Polarity protected 2-pin terminal block and jumper to connect external 5-12VDC power
- Works best with Raspberry Pi model B+ and A+, but can be used with a model A or B if you purchase a 2x13 extra-tall header and solder that instead of the 2x20
- Install the easy-to-use Python library, check out the examples and you're ready to go!
Comes with an assembled & tested HAT, terminal blocks, and 2x20 plain header. Some soldering is required to assemble the headers on. Stacking header not included, but we sell them in the shop so if you want to stack HATs, please pick one up at the same time.
Note:Raspberry Pi and motors are not included but we have lots of motors in the shop and all our DC motors, and stepper motors work great.
Assembly:
Solder on Headers and Terminal Block
Before we can motorin' there's a little soldering to be done. This step will attach the 2x20 socket header so that we can plug this HAT into a Raspberry Pi, and the terminal blocks so you can attach external power and motors.
- Start by plugging the 2x20 header into a Raspberry Pi, this will keep the header stable while you solder. Make sure the Pi is powered down!
- Place the HAT on top so that the short pins of the 2x20 header line up with the pads on the HAT
- And Solder!
Heat up your iron and solder in one header connection on the right.
Once it is soldered, put down the solder and reheat the solder point with your iron while straightening the HAT so it isn't leaning down
- Solder one point on the opposite side of the connector
- Solder each of the connections for the top row
- Flip the board around and solder all the connections for the other half of the 2x20 header
- Check over your work so far, make sure each solder point is shiny, and isn't bridged or dull or cracked
- Now grab the 3.5mm-spaced terminal blocks. These will let you quickly connect up your motor and power supply using only a screw driver
You will have 3 x 2-pin terminal blocks and 2 x 3-pin terminal blocks
- Slide each of the 3-pin terminal blocks into a 2-pin to create two 5-pin blocks
Slide the terminal blocks along the edge of the HAT, so that the 'mouth' of each block is facing out.
You can use scotch or other plain tape to keep the terminal blocks flat against the PCB while you solder
- Flip over the board and solder in all of the terminal block pins
- Check over your work so far, make sure each solder point is shiny, and isn't bridged or dull or cracked
You're done! You can now move onto the software side
Powering Motors:Motors need a lot of energy, especially cheap motors since they're less efficient.
Voltage requirements:
The first important thing to figure out what voltage the motor is going to use. If you're lucky your motor came with some sort of specifications. Some small hobby motors are only intended to run at 1.5V, but its just as common to have 6-12V motors. The motor controllers on this HAT are designed to run from 5V to 12V.
MOST 1.5-3V MOTORS WILL NOT WORK or will be damaged by 5V power
Current requirements:The second thing to figure out is how much current your motor will need. The motor driver chips that come with the kit are designed to provide up to 1.2 A per motor, with 3A peak current. Note that once you head towards 2A you'll probably want to put a heat-sink on the motor driver, otherwise you will get thermal failure, possibly burning out the chip.
Size:65x56x13mm
Package List:
- 1 x Adafruit DC and Stepper Motor module
- 1 x Arduino Source code
- 1 x Schematic diagram
- 1 x Chip datasheet